Light table: a family project
My older daughter (she's 4 years) loves drawing. My younger daughter (she's 1 year old) loves doing whatever her sister does. So last Christmas the three wise men carried a new kids table for them. The “old” one was quite abused already. You get to know how tough things are when you let a kid play with them for a while… Anyway we had already thought about a second life for it.

Some time ago I stumbled on a great “instructables” by Mr. Chutney where he repurposed exactly the same IKEA table we had as a light table. It was very easy and the light table was going to be a great fun for our daughters so I ordered a methacrylate board from a local supplier and a really cheap LED Strip from Amazon Marketplace (mine included a 12V 5A EU-plug power supply) and waited patiently for them to arrive.
Bill of Materials
- An IKEA Lack Table (6.99€)
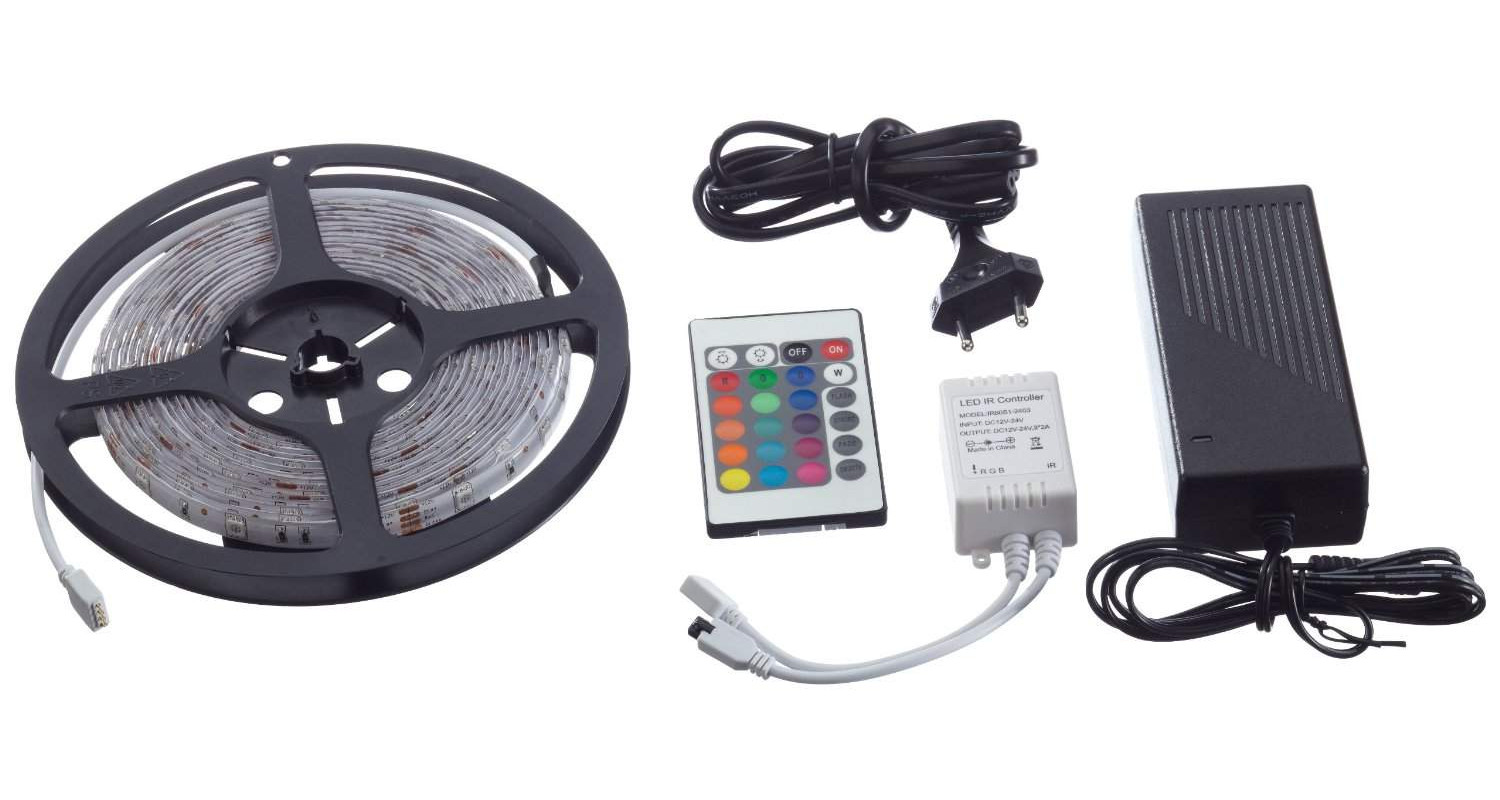
- Am 5 meters RGB 5050 LED Strip, with remote and power supply (I bought mine for 15.50€)
- A 550x550mm methacrylate board, snow-translucent (44€ from local supplier). Have them drill 4 holes in the corners for you: 5mm diameter, 30mm from each side.
- 4 20x5mm, round head, screws to fix the methacrylate sheet to the table (some cents)
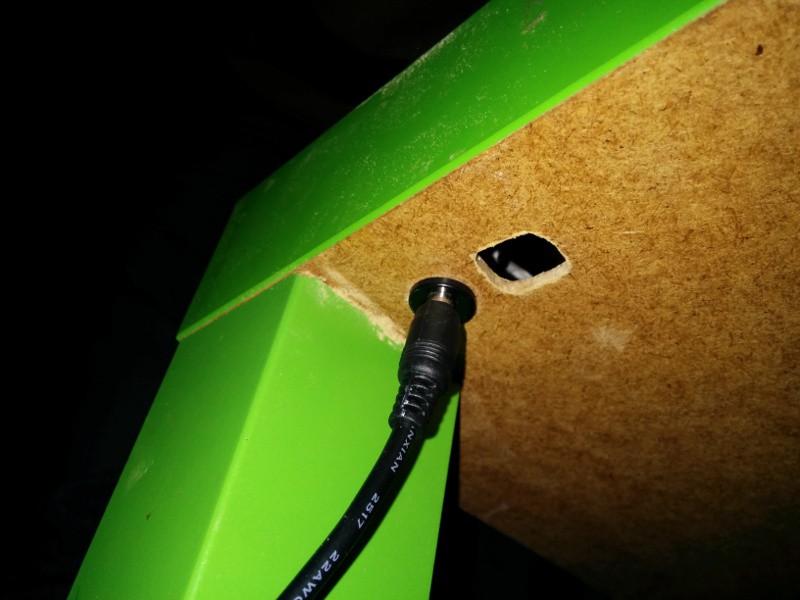
- A 2.1x5.5mm DC barrel jack for box mounting like this one (0.74€)
- White glossy paint (optional but recommended)
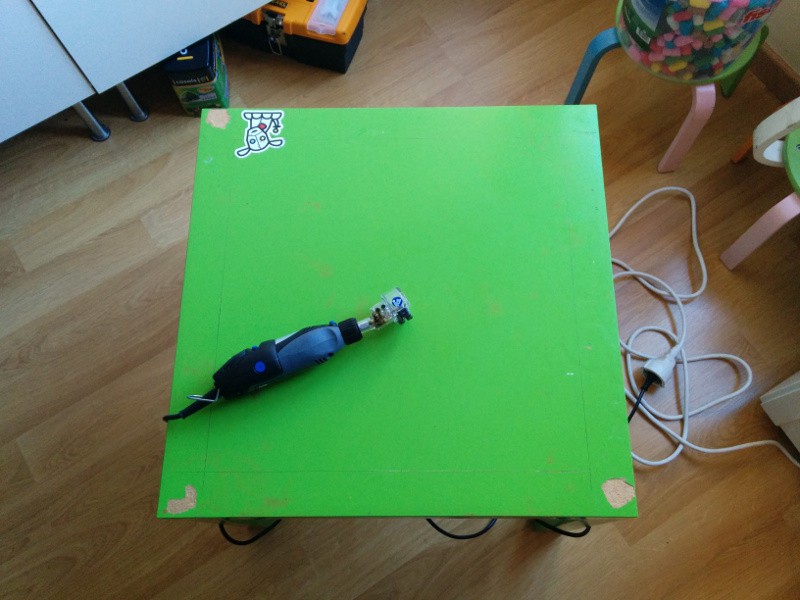
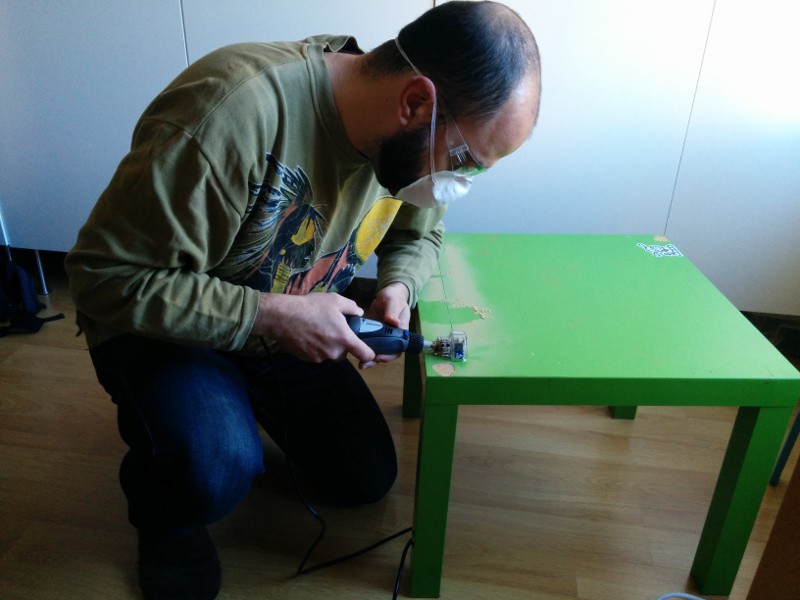
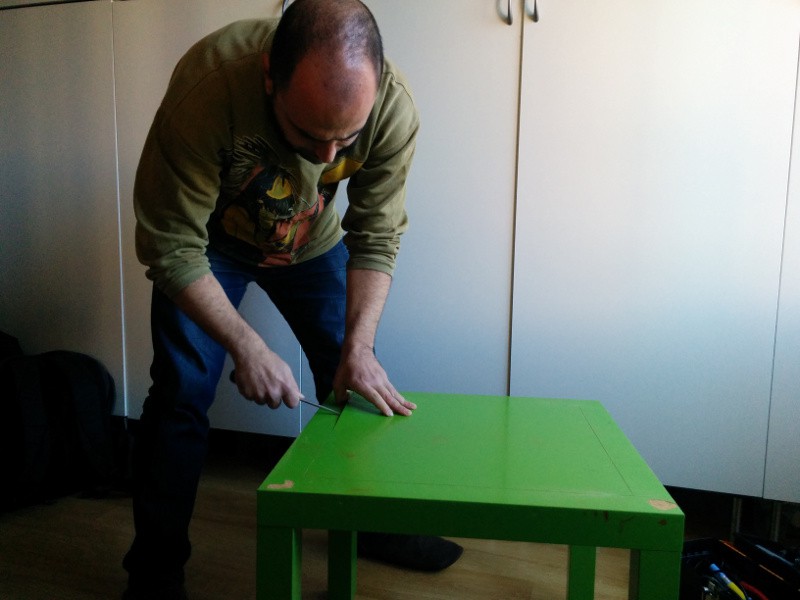
- Tooling (a Dremmel to cut the table although a cutter might do, a paint brush, masking tape, wires, ruler, pencil, safety glasses and a dust mask…)
Yep, that's just about 67€ of materials. Not bad if we compare it with the 300€ of the cheapest ones you can find on the Internet.
Procedure
Since Mr. Chutney article is very explanatory I will only comment the differences in my approach. He used two sheets of translucent material: a 8mm clear acrylic sheet that fits in the table hole and a second thinner 3mm “opal” one over it without covering the entire table surface. To do so he needed to recess the solid table legs in the corners to hold the first acrylic sheet which should fit exactly the hole dimensions.
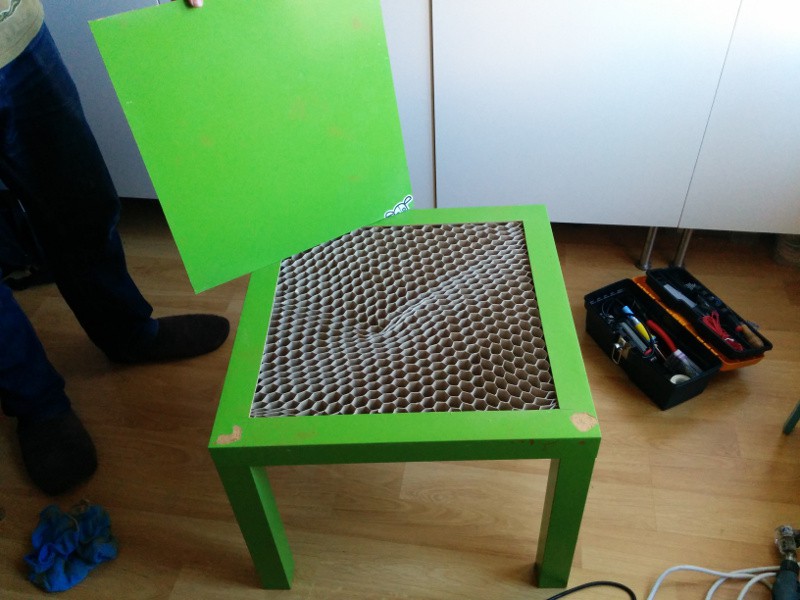
Since “exactly” is too precise for me I planned a simpler solution. Besides, I wanted the translucent sheet to cover the whole surface of the table so I just cut the hole leaving 50mm each side (the size of the legs) and bought a 550x550mm translucent sheet with four holes where I would screw it to the solid legs. You can order the methacrylate sheet with rounded edges for a better finish but laser cut finish was OK for me.
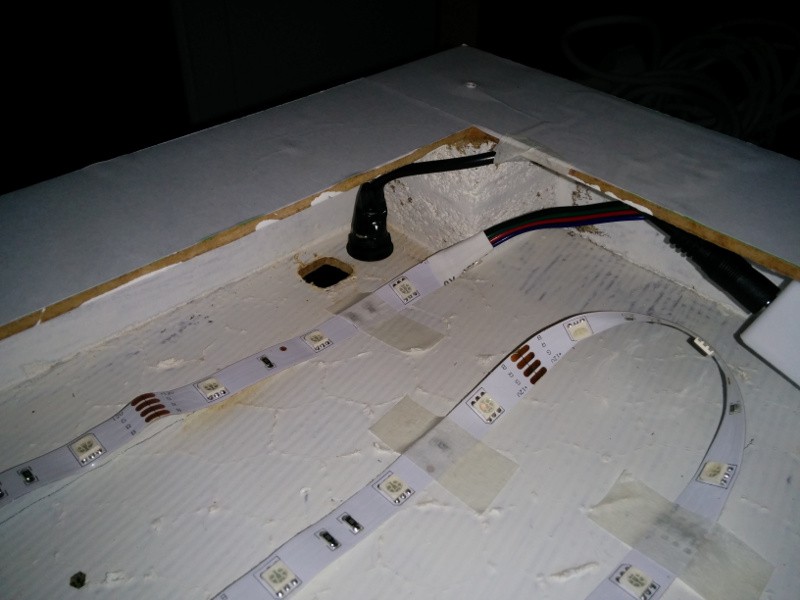
Under the thin wood surface of the table there is a pattern of cardboard that provides consistency to the table while keeping it light. The cardboard is easily removable by hand leaving a nice space under the remaining table surface for the LED strip controller.
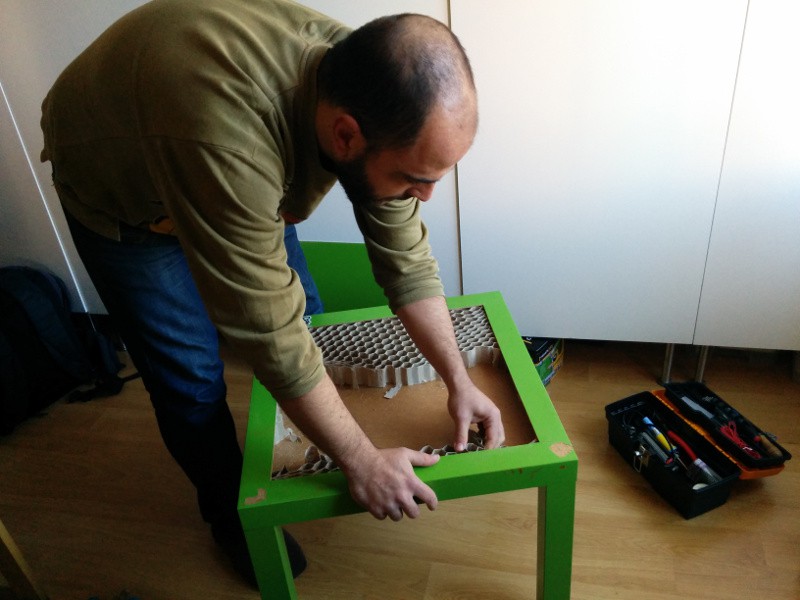
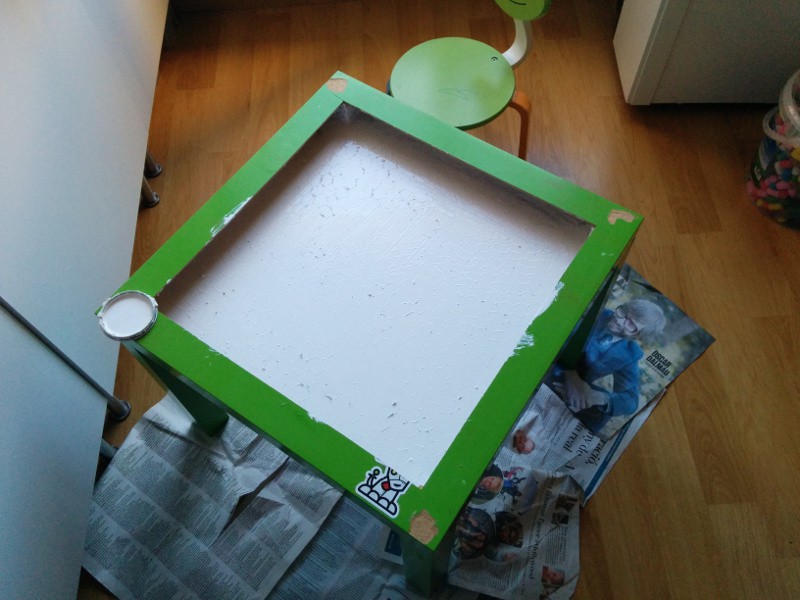
Once I had the interior clean I painted it with white glossy paint. As Mr. Chutney says it does make the difference. This was my 4 year old daughter task and she enjoyed messing with the paint (maybe too much).
Then I drilled a hole the size of your DC barrel jack near one of the legs. The barrel jack is a neater solution than having a cable hanging from under the table. My LED strip came with a short 2.1x5.5mm pigtail which I soldered to the terminals of the jack but you can just wrap the wires to them and use some glue, electrical tape or a small stretched plastic tube to keep them in place.
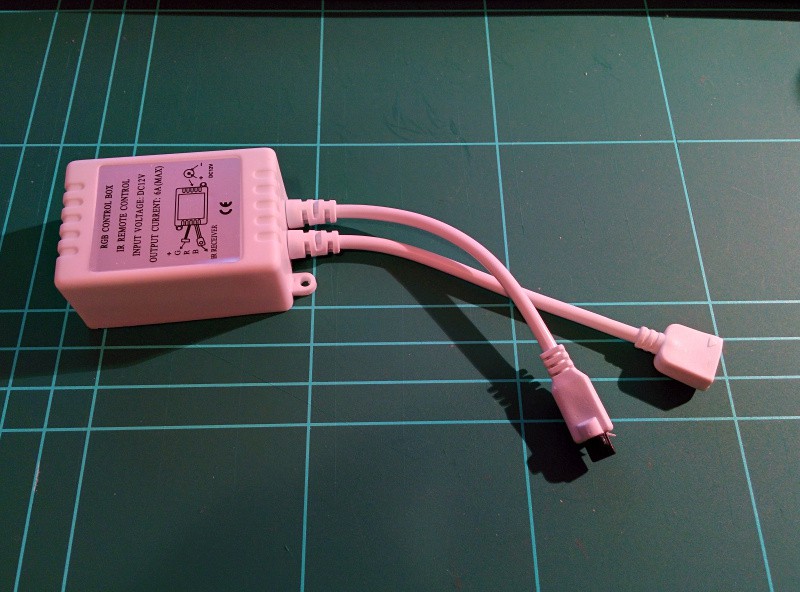
It was time to run a quick test to see if everything was OK. I connected the strip and the short power cable to the controller and the power supply to the jack under the table, pressed the ON button in the remote and the LED strip shined white. Good.
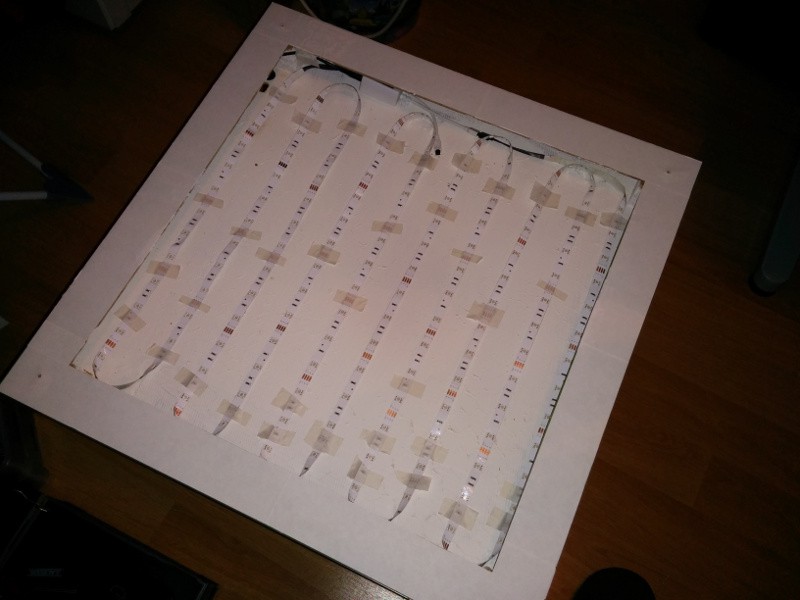
Next step was to plan how to stick the strip trying cover the whole surface evenly to have a uniform light. I tried a couple of approaches starting from the end near the controller. The final one is a “S” pattern but now that I'm thinking about it again I will probably try a new one next time I open the table: a squared ellipse going outside in. The wood surface is rough and chances are your strip wont stick long. I used some tape to keep it in place.
I used adhesive white paper to hide some scribbles and stickers on the remaining surface of the table. Using some masking tape and painting it white would have been also an option.
Finally I screwed the methacrylate sheet to the table with four 20x5mm round head screws.
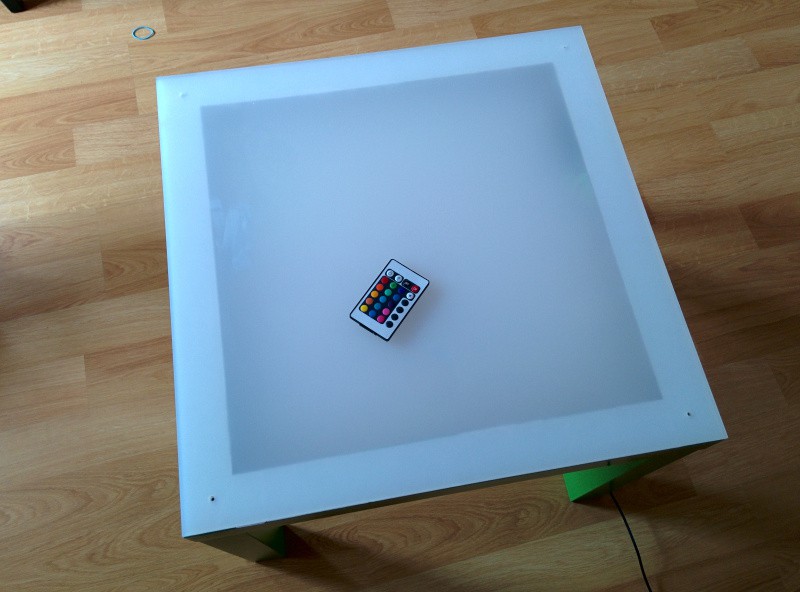
The LED strip I used is an RGB one with 5050 chips. You can't control the LEDs individually (they are not addressable) but you can set the whole strip to whatever color you want. The controller has a 2.1x5.5mm barrel jack for power input, a 4 wire connector for the LED strip and an IR receiver that reads the codes from the remote even through the sheet of methacrylate. So you just point to the table and select the color you want and voilà. My daughters love it!
Conclusions?
This is a low-tech project but a very fun one. If you have kids they will love this table. My little one (1 year old) likes playing with some colored rounded glasses we have, spraying them over the table and changing the light color with the remote to see how the glasses change. The older one uses it to copy drawings or x-ray negatives and it doubles as a chillout/mood light for their bedroom!

The only issue I had was with the brightness control and the effects. Although the remote has a couple of buttons to rise and lower brightness it simply doesn't work. And three out of the four color effects you can play with are just too psychedelic for my taste (strobing light, flashing,…).
But maybe I can do something about it… :D
"Light table: a family project" was first posted on 24 February 2014 by Xose Pérez on tinkerman.cat under Projects and tagged dremel, lack, led strip, light table.