The MikroTik wAP LoRa8 is here
Last week I was at the The Things Conference in Amsterdam with a collegue from TTN Catalunya. You could smell the hype. Most of the big players were there. I had the chance to attend some interesting presentations, talk at the booths with people from PyCom, RAK, WifX or SeeedStudio and meet and devirtualize some people like Gonzalo Casas or Andreas Spiess.
Then there were the workshops. You know, I've done a lot of workshops myself and I know that it is hard (if not impossible) to go through a complete workshop without issues. With experience you get to have a plan B, C, D,… all the way down to Z. But number one issue is allways the WiFi: never trust the connection provided by the organisation and never ever pretend to have several AP running at the same time in a small room. It won't work.
That's what happened in the MikroTik workshop where the guy from the company was presenting the MikroTik wAP LoRa8 Gateway. You have to configure it via an AP it creates. As soon as the 20 people there plugged their gateways nothing worked and that was the end of the workshop. The good (better than good) part is that they were giving them away so now, with a little more time and less crowded spectrum, I have had the chance to finally test it.
The hardware
Some specs
MikroTik are very well known for their radio link boxes. They are compact and have great performance. The wAP LoRa8 follows the same line. Some interesting specifications:
| Product code | RBwAPR-2nD |
| CPU | QCA9531 650 MHz |
| RAM | 64MB |
| Ethernet | One 10/100 ethernet port with passive PoE 9-30V |
| WiFi | Built-in 2.4 GHz 802.11b/g/n, dual-chain |
| LoRa Concentrator | R11e-LoRa8 MiniPCIe |
| LoRa Band | 868-870 MHz |
| LoRa TX Power | Up to 20dBm |
| Lora Sensitivity | -137dB @ SF12 |
| Supported LoRa devices | Class A and C |
| LoRa Antenna | 2dBi internal PCB antenna and external SMA connector |
| Operating System | Router OS 6.XX |
| Power consumption | Max 7W |
| Operating temperature | -40C to 60C |
| IP protection | IP 54 |
The system runs smoothly with that specs. The only downside is the lack of GPS, so no support for Class B devices.
There is also a wAP LoRa9 sporting the R11e-LoRa8 concentrator suitable for the US.
Unboxing
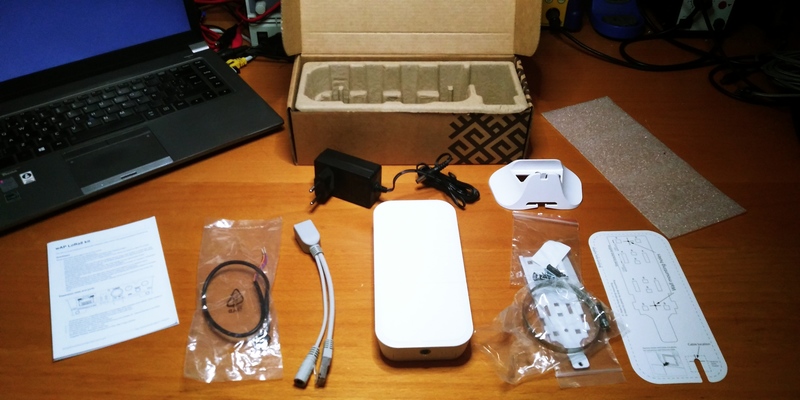
The kit comes fully featured except for the lack of an external antenna, something you must source yourself for good outdoors performance. In the box you can find:
- A getting started manual (scarce but forth following at least the “configuration” section)
- A simple PoE injector
- A 24V 800mA switching power supply
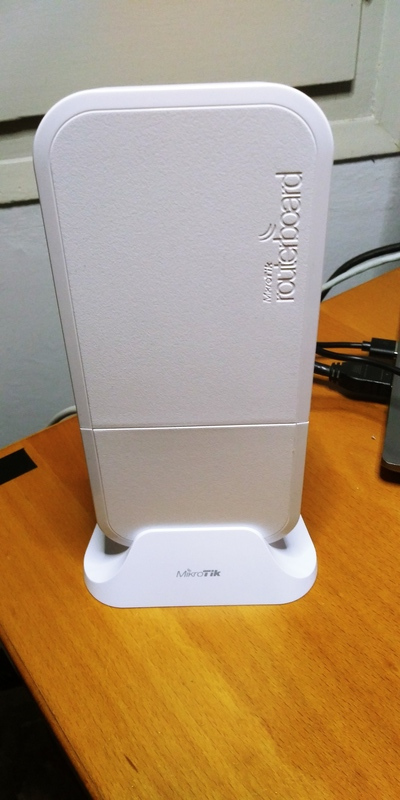
- A desk stand to set the gateway vertically
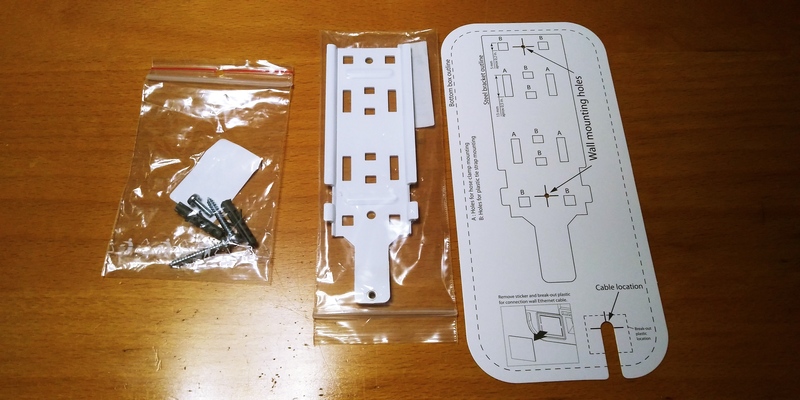
- Outdoor bracket, screws, a hose clamp and a wall template to help you mount the gateway on the wall or a pole
- A 4 wire cable for the “automotive connector” (?)
- And the gateway itself
Peeking inside
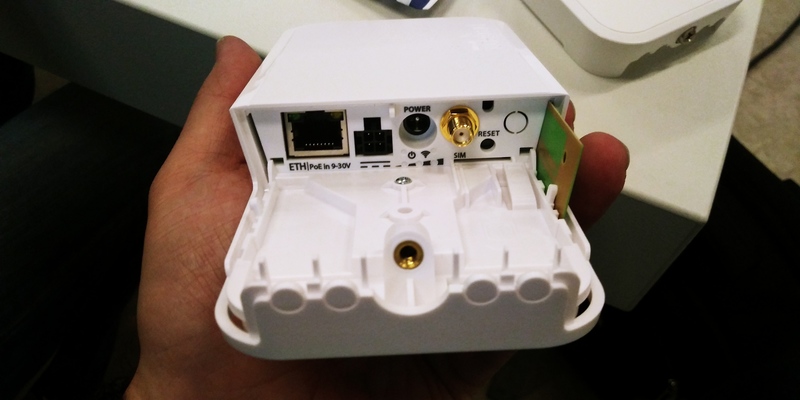
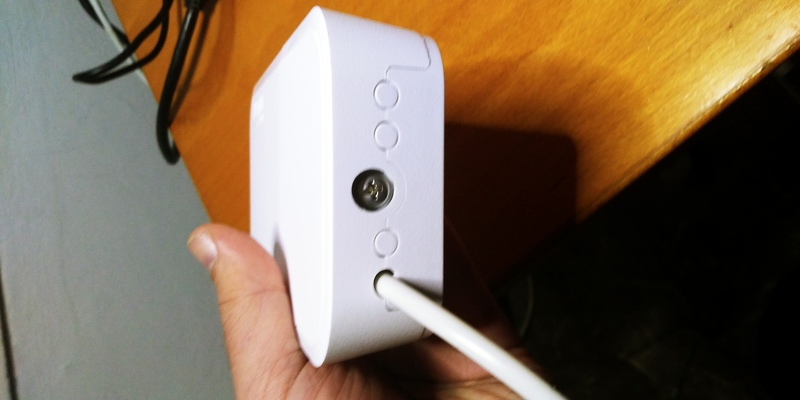
To open up the case, untight the bottom screw and remove the lid. You will see the front plate with the ethernet socket, power socket, SMA connector, a couple of LEDs for power and WiFi and a 4 pin connector (automotive connector?). There is also a reset button and a SIM card slot.
Now unscrew the small philips screw and slide the case down.

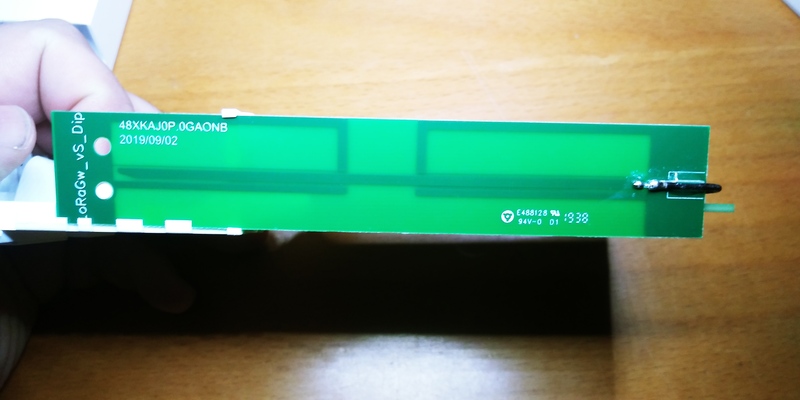
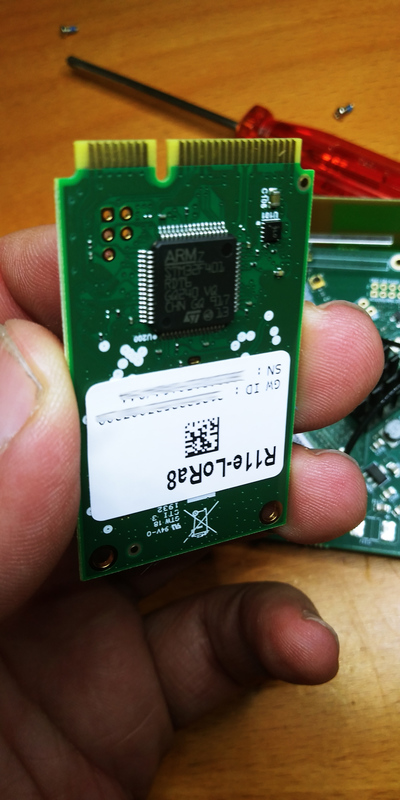
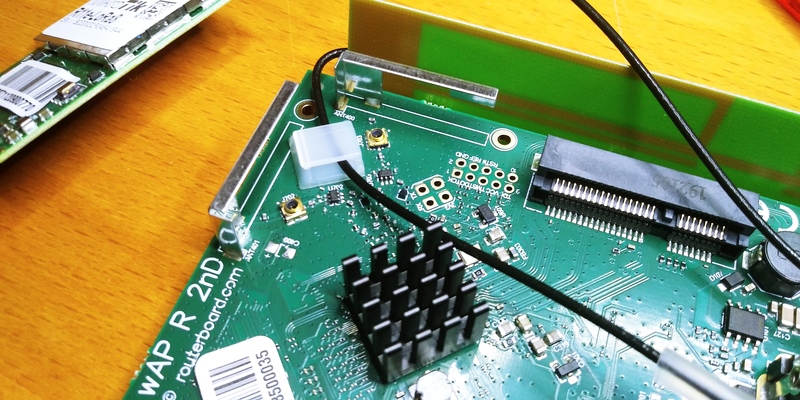
The first thing you will notice is the Mini-PCIe LoRa concentrator, part number R11e-LoRa8. Also very noticeable the PoE circuitry, a black disipator and the two iPEX cables for the included antenna and the external SMA connector.
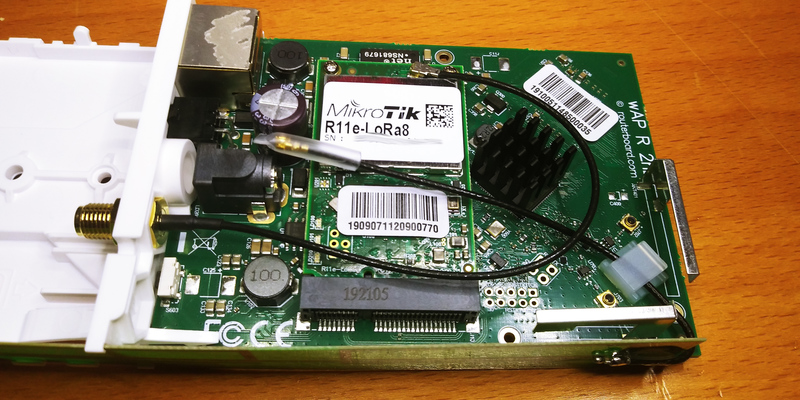
On the side you have the 2dBi (dipole) PCB antenna. In my unit the concentrator was connected to the external SMA connector, even thou the guy at the workshop told us it was connected to the PCB antenna. So it will probably be a good idea to check it yourself before powering the device.
The MiniPCIe module shows a shielded module -probably the LoRa frontend- and an STM32F401 microcontroller. Maybe the interface to the motherboard is not SPI like with other LoRa modules in the market.
On the motherboard you can also see the dual channel wifi transmission lines with iPEX connectors, a serial interface and a programming interface.
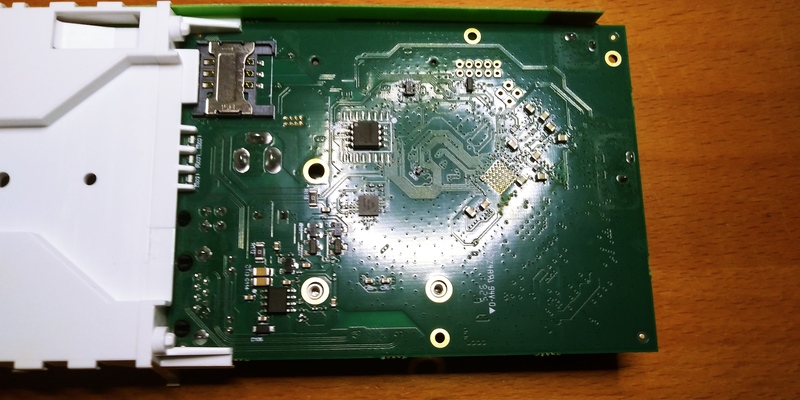
On the back we can see a SIM socket for an LTE backhaul (accesible form the inner front panel too), but there is no documentation on the getting started guide on how to configure it, you have to check the online RouterOS documentation.
You can either connect the power plug directly to the power socket in the gateway and an UTP cable to the ethernet socket or use the included PoE injector to feed the power via the ethernet cable. To close the lid with the cable connected you will have to strip out a small plastic dot and use the stand to place the gateway on your desk vertically.
The software
Router OS
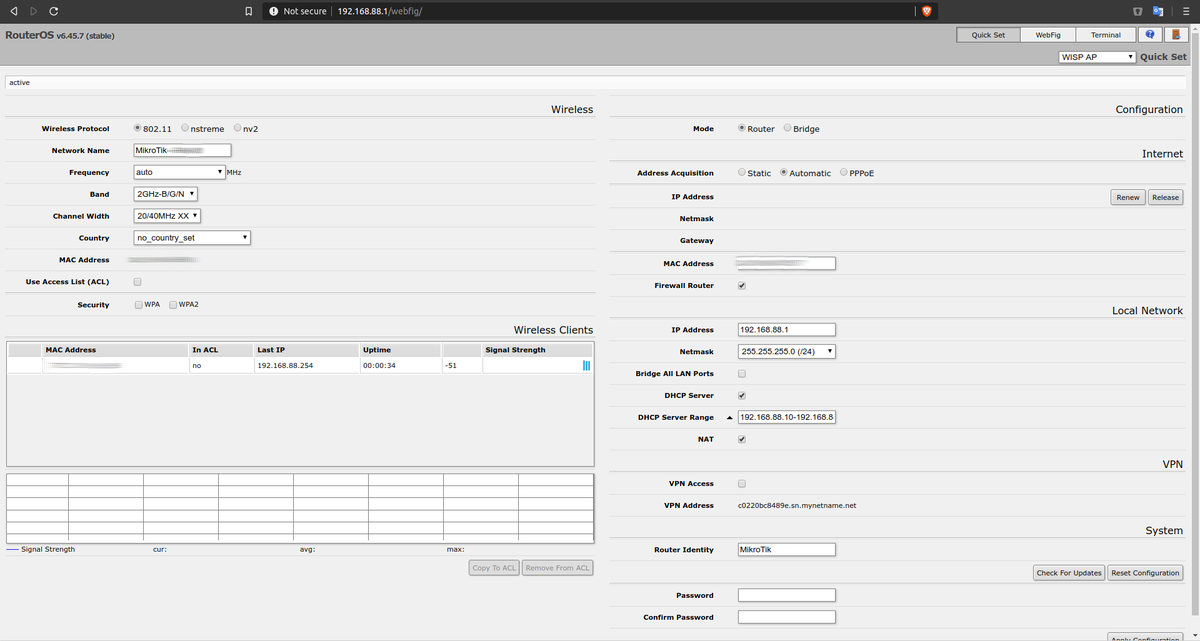
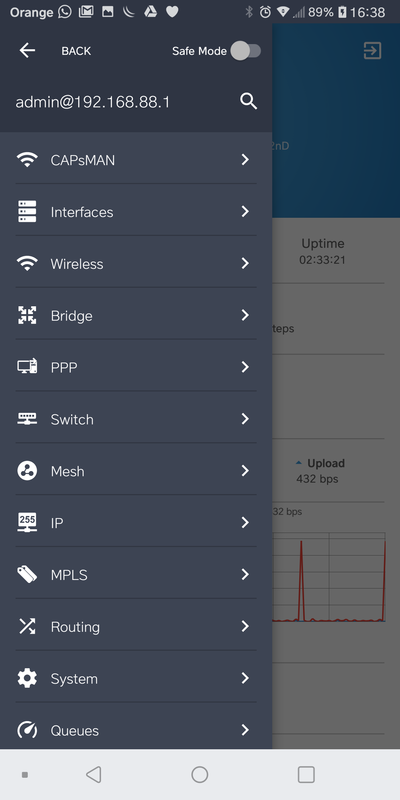
Well, this is where this gateway really shines. The Router OS is a fully featured router management system. You will not miss a single thing. By default you will be able to access to it via WiFi. Look for an open MikroTik-XXXXXX WiFi access point. Once connected open a web browser and visit http://192.168.88.1. The username will allways be “admin” (you cannot change this, but you can create a new one) and the default password is no password.
You can configure the basics from the initial Quick Set page (set the network name and WiFi country, change the default password).
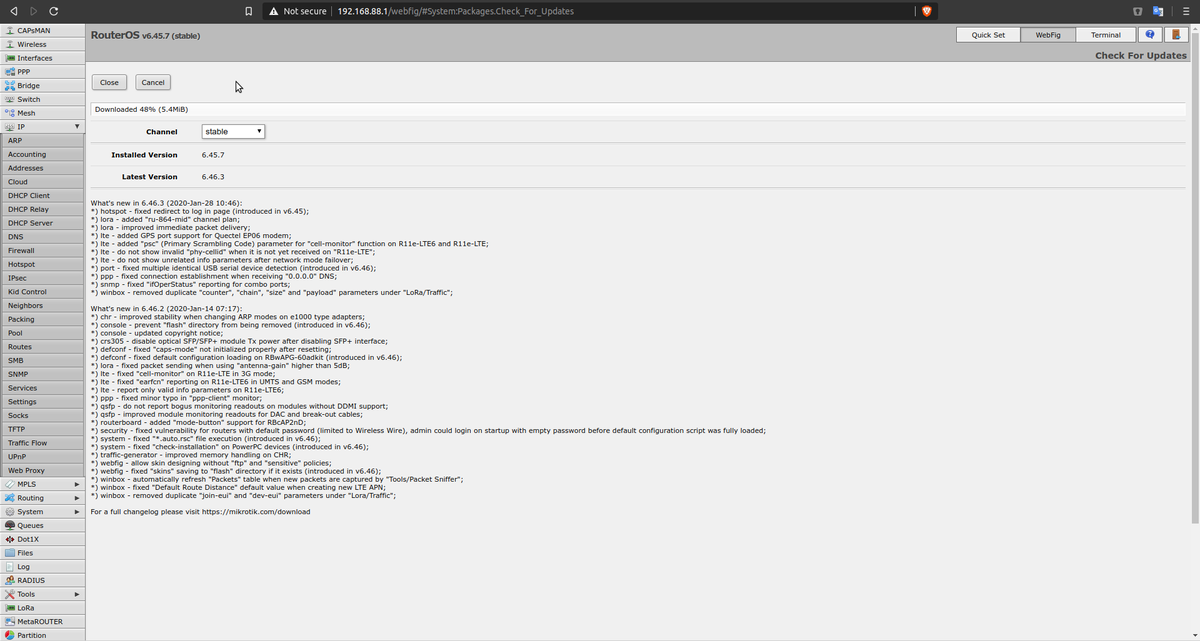
A good starting practice is also to check for updates. In my case I upgraded the OS from 6.45.7 to 6.46.3, always stable versions. As you can see in the change log they are actively working on improvements everywhere, including in the LoRa support.
Configuring for TTN and other LNS
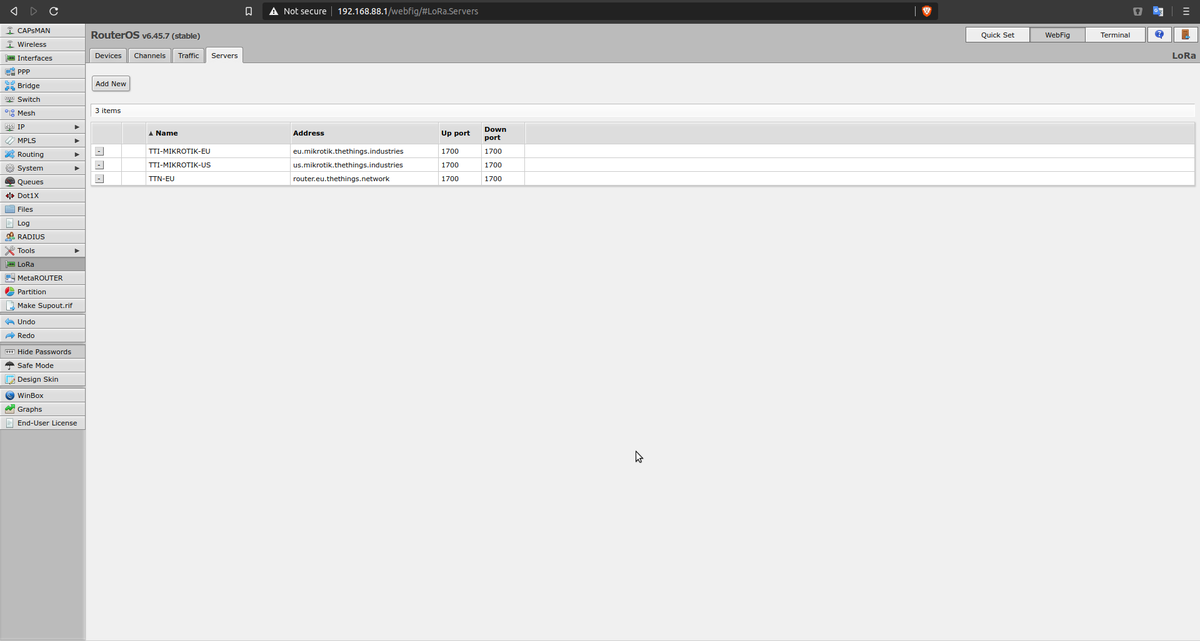
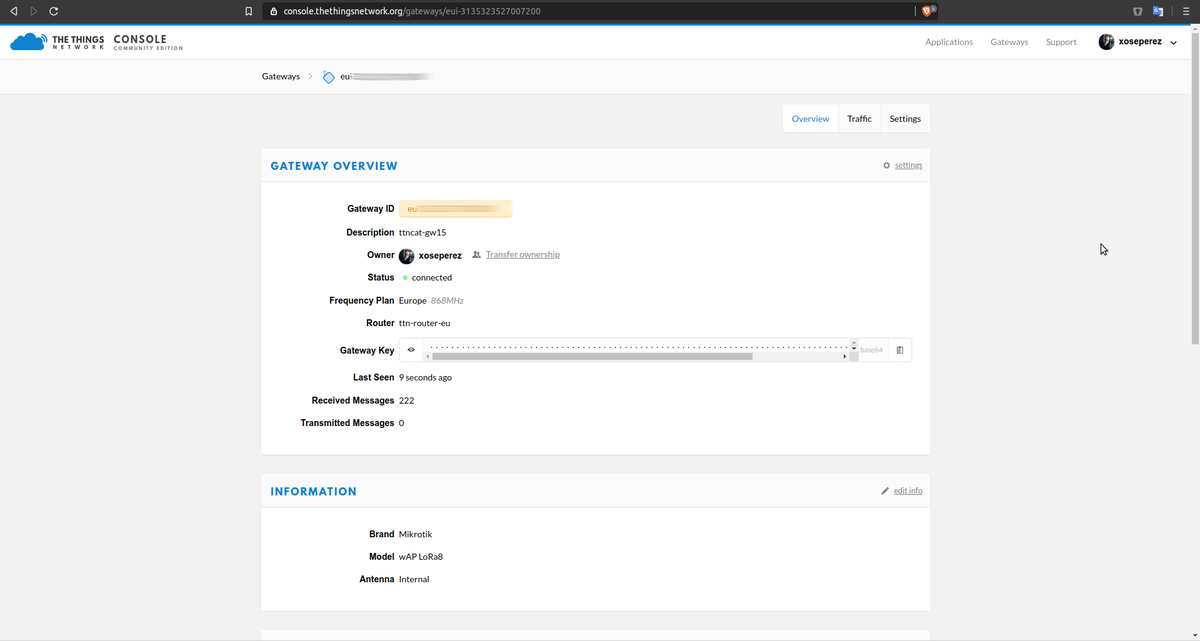
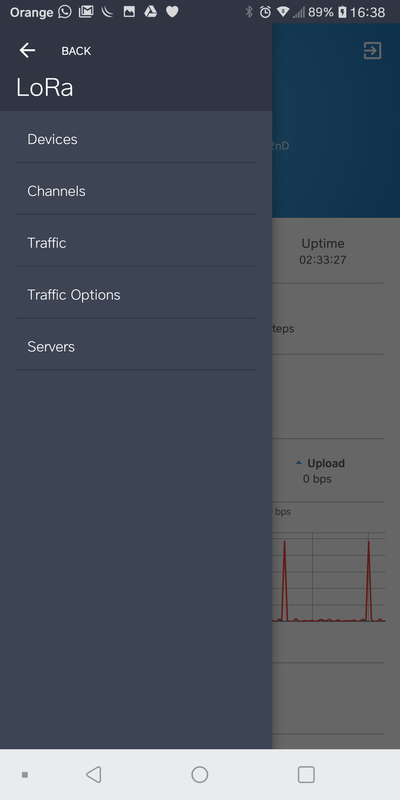
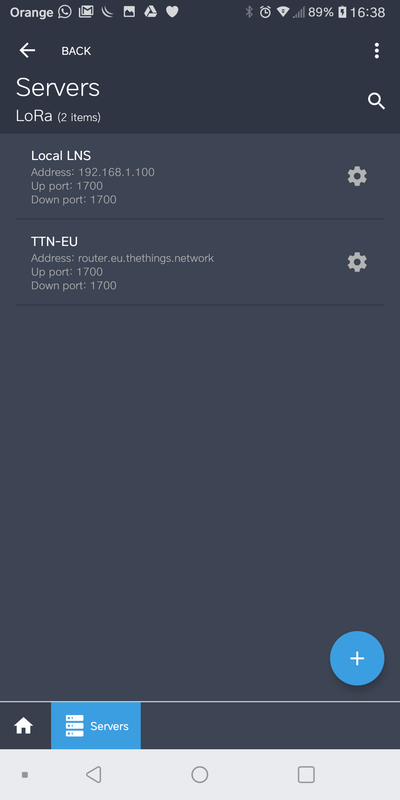
The most interesting section for us is, of course, the LoRa section (click WebFig on the top right menu and then LoRa on the left side tabs). You will be able to define Servers, Channels, Devices and see the Traffic. I would first start with configuring the Servers. By servers MikroTik means “LoRaWAN Network Servers” with Semtech UDP legacy packet forwarder support, since this is the only forwarder supported by the gateway at the moment. We can add as many LNS as we want, including the TTN EU server. You have an Add button on top of the list and you can also single click on any of the already defined to edit it or click the small - button to delete it.
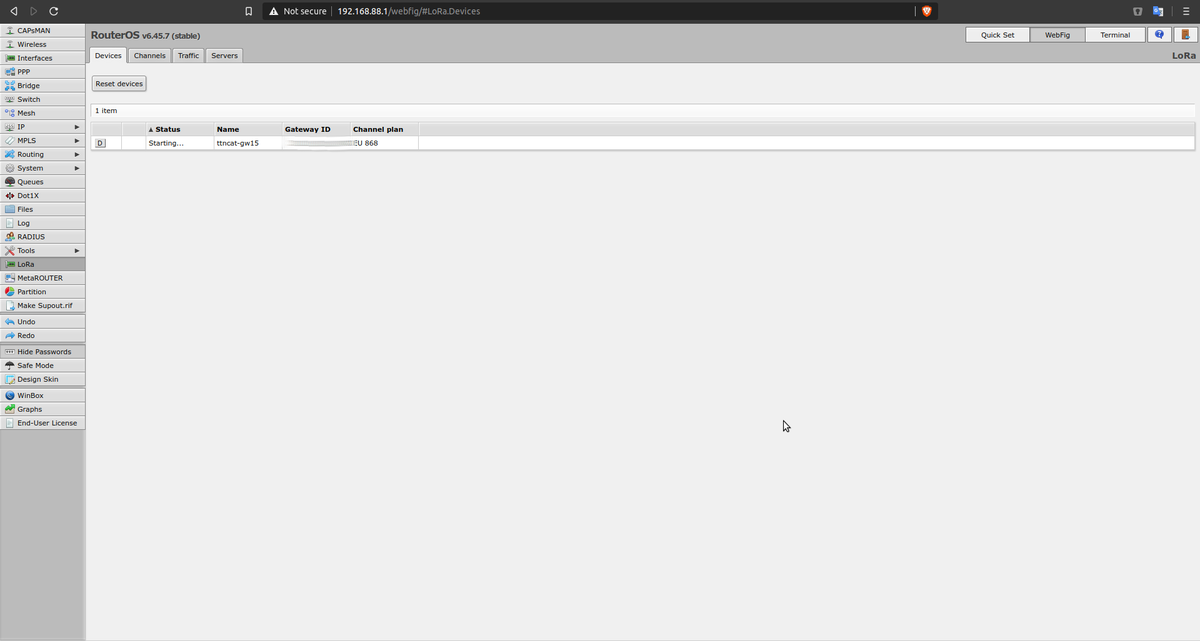
Once the LNSs are configured, click on the Devices tab and single click on the only device in the list.
You can change the gateway name here, check the EUI and define where to forward the packets. It took me a while to know how to define this. Basically you have to click on the small triangle facing down by the “Network Servers” label to add one LNS slot and select which one you want to forward the messages to from the list of servers you have defined before. Click again on the facing down triangle to add more (so you can forward the message to more than one LNS). Click on the small triangle on the right side of the dropdown to remove that slot from the list of LNS to use.
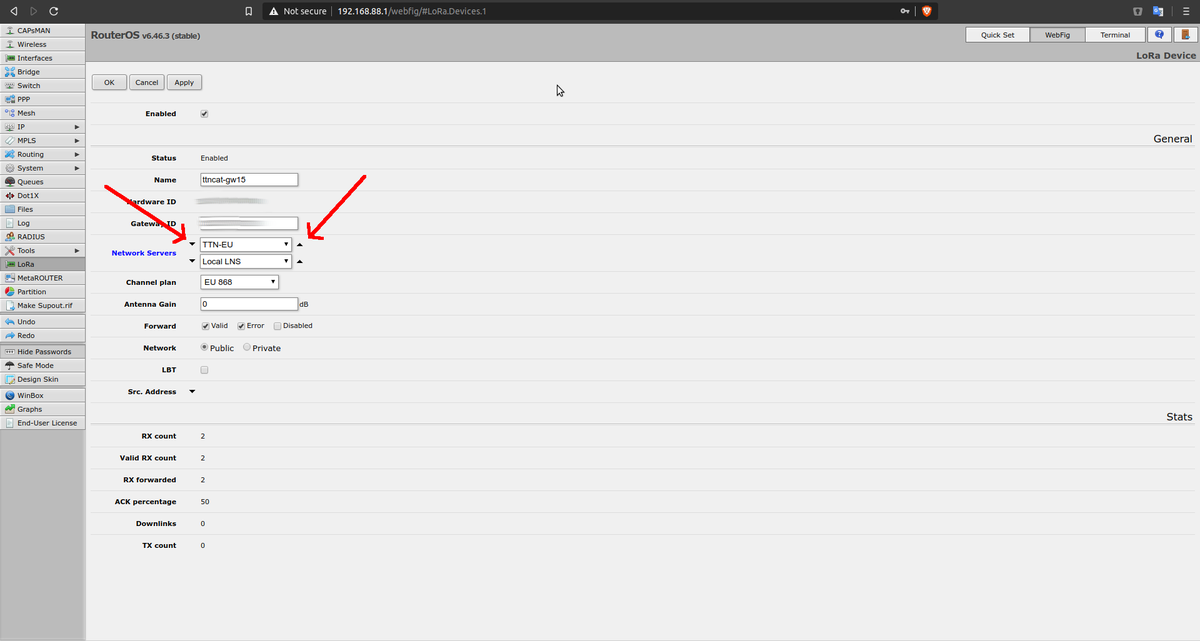
There are other options you can configure, of course, like defining the channel plan, what kind of packets to forward or enabling the Listen Before Talk (LBT) feature. Once configured check the enabled checkbox and you are ready to go. You will not be able to make changes to the device while enabled.
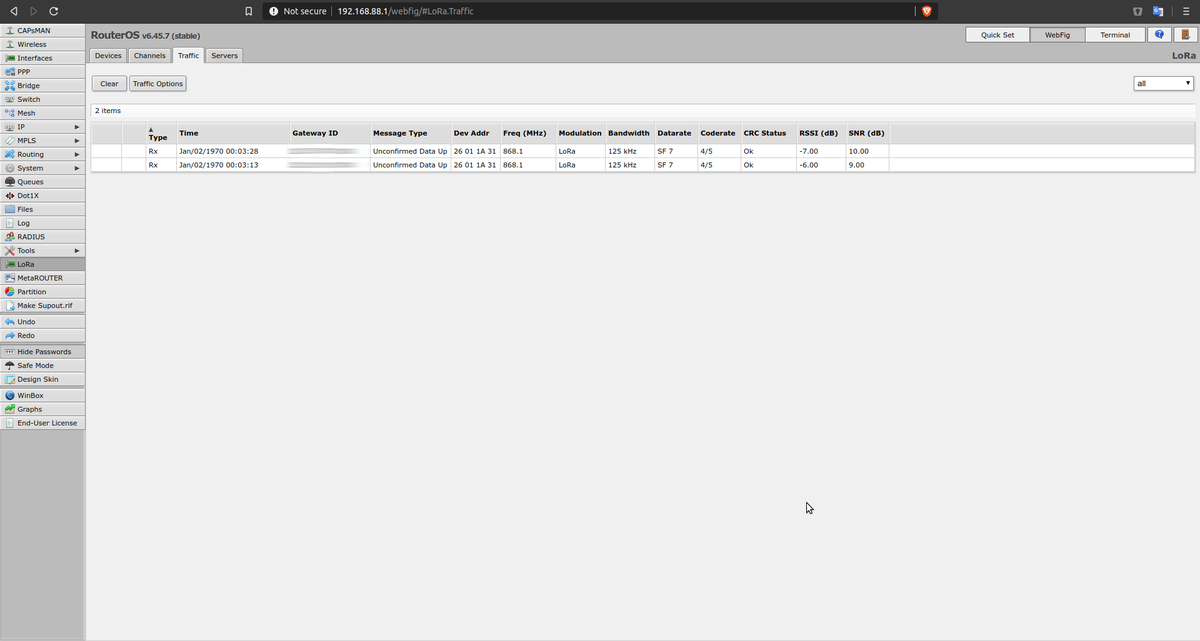
On the Traffic tab you will see the incomming messages and in your LNS you will be able to claim your gateway using the Semtech UDP Legacy packet forwarder and using the Gateway ID in the device definition as EUI.
MikroTik App
Another option to configure the gateway, and a very good one when deployed in the field, is to use the MikroTik App. You can configure almost any setting from the app and the interface is as responsive as the web one.

Overall impression
My first impression is that this is a superb product. And it's only 200€!!. This is a potential game changer. MikroTik has added LoRaWAN connectivity to an already incredible routing solution. I'm sure there are lots of options yet to explore. My only “but” is that the web interface is not very intuitive sometimes, it lacks some UX work. The mobile app on the other hand is very easy to use and you can easily get the gateway working in a few minutes with it.
Now I will test it for some days, while we find a proper location for it, maybe on our new office in the center of Barcelona.
"The MikroTik wAP LoRa8 is here" was first posted on 07 February 2020 by Xose Pérez on tinkerman.cat under Analysis and tagged ttn, the things network, ttncat, tti, mikrotik, routeros, the things industries, lora, lorawan, gateway, pci express, antenna, sma, semtech, lorawan network server, lns, listen before talk, lbt.