Decoding 433MHz RF data from wireless switches
[Update 2013-03-01] I have added more documentation on the codes these remotes use in a different post.
I'm starting to move towards not only gathering information but also acting. My first project in this subject will be controlling some lights and the house heaters. So last week I visited the urban market of “Els Encants” in Barcelona and bought some very cheap wireless outlets.
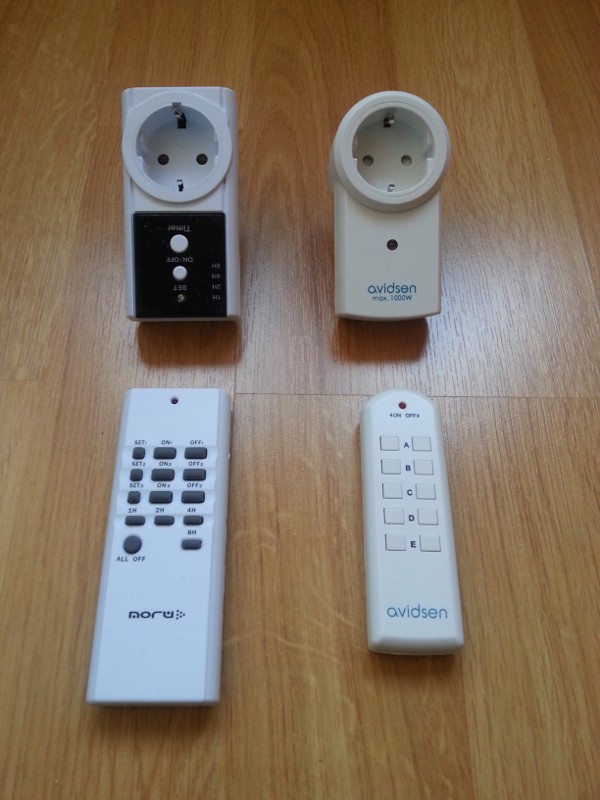
Two different remotes
I bought two sets of three wall plugs, each set with it's own remote. They all transmit in the 433MHz frequency and I already had a set of transmitter and receiver for that frequency so as soon as I had some time I started trying to intercept and reproduce the codes the remotes were sending.

In the image above you can see an outlet and the remote for each of the sets. The left one is branded “Noru” and each outlet is rated 3kW (good for the heaters) and it features auto switch off time (1, 2, 4 or 8 hours). The remote can control a maximum of 3 outlets and apparently it is programmable, since you first have to sync the outlets with the remote.
The right one is branded “Avidsen”, also 433Mhz but rated 1000W, just below the consumption of my house electrical heaters, but good to control lights and other appliances. It's got the very common dip switch to sync the remote and up to five outlets. There are 32 different channels available. So if your lights switch on and off randomly maybe you neighbour is using the same channel you are, then you better change the channel.
Available libraries for Arduino
I started reading documentation about the protocol these devices use and found out there is some very useful information out there. In fact there are even a couple of libraries for Arduino. The first one is called RemoteSwitch and it is a little old, it has not been ported to Arduino 1.0 but if you are like me you will keep a copy of Arduino 0023 just for this kind of situations.
The second library is called RCSwitch and I have to say it is a neat piece of code. It has been ported to the Raspberry Pi, although the port is not as updated as the original Arduino library.
My first tests with the RemoteSwitch library were encouraging. The Show_received_code sketch dumped the codes for the Avidsen remote one by one. I though: if it can decode it, it should be able to recreate it. And it worked from scratch. Good!
But by then I knew I wanted to use the newer library. There were several reason for this: it is being actively developed, it supports more protocols, the code is much more elegant and object oriented and it has a port to RPi, which I plan to use as a central gateway soon. So I checked which one of the RCSwitch protocols matched the one I had successfully used with RemoteSwitch and started doing some more tests…
Slightly different protocol
Here was when things started to get complicated. The thing did not work. So I spent a couple of hours studying the code for both libraries, decoding the codes the RemoteSwitch library had dumped before and trying to find the difference. Until I found it: RCSwitch.cpp, line 239, that ‘0’ should be a ‘1’… and everything started working again. Very good! I started a thread in the library forum to find out whether this is a bug or a slightly different protocol.
Index: RCSwitch.cpp
===================================================================
--- RCSwitch.cpp	(revision 219)
+++ RCSwitch.cpp	(working copy)
@@ -284,7 +284,7 @@
         if (sGroup[i] == '0') {
             sDipSwitches[j++] = 'F';
         } else {
-            sDipSwitches[j++] = '0';
+            sDipSwitches[j++] = '1';
         }
     }
By the way, the protocol of these things is pretty interesting. It's worth a look at Sui's post to get an overview of the implementation. The tri-bit concept is really awkward.
Using the Bus Pirate and OLS Logic Analyser
Then I moved to the other set of outlets. These are rated 3000W so I plan to use them to control my house heaters, which is the main reason for all this work. I followed the same steps, starting with getting the codes with the Show_received_code sketch. But weird enough the library was only able to decode some of the button presses… Only the SET button for outlet #1, the ON and OFF buttons for outlet #2, the ALL OFF button or the 2, 4 and 8H timeout buttons seemed to work.
This time it was going to be harder, since I didn't even have all the codes. Well, a good opportunity to use my Bus Pirate!

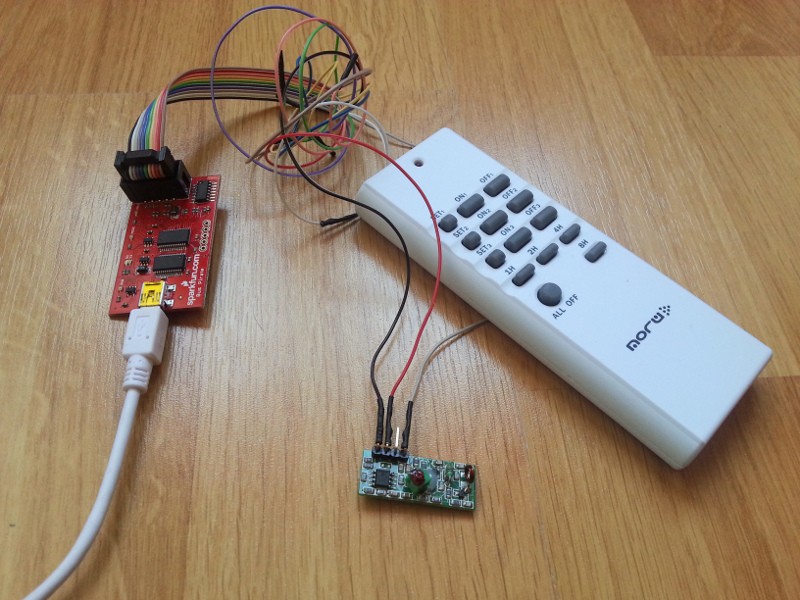
So I plugged the RF receiver to the Bus Pirate and launched the OLS Logic Analyser to capture the signal from the remote.
You don't have to configure anything to use the Bus Pirate as a (low speed) logic analyser. But since I wanted to power the radio receiver with the BP I had to enable the Power Supply mode. To do so you have to open a terminal session, type ‘?’ to get a prompt, select one of the modes that allow enabling the power supply typing ‘m’ and selecting the mode (like UART, for instance) and then type ‘W’ (uppercase to enable, lowercase to disable). Then you can close the session and it will keep the power on the 5V and 3V3 lines as long as it is plugged to the computer. Mind you have to free the port so the logic analyser software can use it. I had problems doing it with screen or minicom, but it worked great with picocom.
After some tests with the Avidsen remote (I knew what the codes were so I could compare the signal output with the actual code) I started getting the signals for each and every button in the Noru remote.
The image below shows the signal for the ON button for the outlet #1.

Now, since the RemoteSwitch library was able to decode some of the signals, the protocol could not be that different. So I started to decode manually all the signals applying the same protocol. The signal is a series of 12 tri-bits plus a sync-bit. For the Avidsen-like remotes there are 3 different tri-bit values (logically), they are called 0, 1 and F, for “floating”. Each tri-bit has a pulses shape. The following tables describes the pulses:
| Tri-bit | Pulses |
|---|---|
| 0 | short high + long low + short high + long low |
| 1 | long high + short low + long high + short low |
| F | short high + long low + long high + short low |
The long pulses are about 3 times the length of the sort ones. The overall period is a characteristic of each remote. There is also a trailing high pulse followed by a long low which is called “sync bit”.
A fourth tri-bit?
Decoding the signals from the Noru remote I found out that there was a fourth tri-bit value (well maybe I should call them tetra-bits now). In fact it is obvious since there is a forth option for an alternate sequence of 4 highs and lows. I've named the new tetra-bit X (for unknown, but also after my name :P). The full table for the Noru remotes is:
| Tretra-bit | Pulses |
|---|---|
| 0 | short high + long low + short high + long low |
| 1 | long high + short low + long high + short low |
| F | short high + long low + long high + short low |
| X | long high + short low + short high + long low |
Now the previous image for the ON#1 button can be decoded as 1F000001FFX0S. With a small patch I could make this work with the RCSwitch library. The library cannot create the code but you can feed it to the sendTriState method to generate the signal.
Index: RCSwitch.h
===================================================================
--- RCSwitch.h	(revision 219)
+++ RCSwitch.h	(working copy)
@@ -106,6 +106,7 @@
     void sendT0();
     void sendT1();
     void sendTF();
+    void sendTX();
     void send0();
     void send1();
     void sendSync();
Index: RCSwitch.cpp
===================================================================
--- RCSwitch.cpp	(revision 219)
+++ RCSwitch.cpp	(working copy)
@@ -441,6 +441,9 @@
         case '1':
           this->sendT1();
         break;
+        case 'X':
+          this->sendTX();
+        break;
       }
       i++;
     }
@@ -561,6 +564,16 @@
 void RCSwitch::sendTF() {
   this->transmit(1,3);
   this->transmit(3,1);
+}
+
+/**
+ * Sends a Tri-State "X" Bit
+ *            ___   _
+ * Waveform: |   |_| |___
+ */
+void RCSwitch::sendTX() {
+  this->transmit(3,1);
+  this->transmit(1,3);
 }

 /**
And this is a sample code for Arduino that switches on and off outlet #1 every 2 seconds.
#include <RCSwitch.h>

RCSwitch mySwitch = RCSwitch();

void setup() {

  Serial.begin(9600);

  // Transmitter is connected to Arduino Pin #11
  mySwitch.enableTransmit(11);

  // Optional set pulse length.
  mySwitch.setPulseLength(302);

  // Optional set protocol (default is 1, will work for most outlets)
  mySwitch.setProtocol(1);

  // Optional set number of transmission repetitions.
  mySwitch.setRepeatTransmit(6);

}

void loop() {
    mySwitch.sendTriState("1F000001FFX0");
    delay(2000);
    mySwitch.sendTriState("1F000001FFFX");
    delay(2000);
}
Again, comments are more than welcome!
"Decoding 433MHz RF data from wireless switches" was first posted on 28 February 2013 by Xose Pérez on tinkerman.cat under Analysis, Code, Learning, Projects and tagged 433 mhz rf, arduino, bus pirate, code, logic analiser, ols.