4Duino-24 upside down
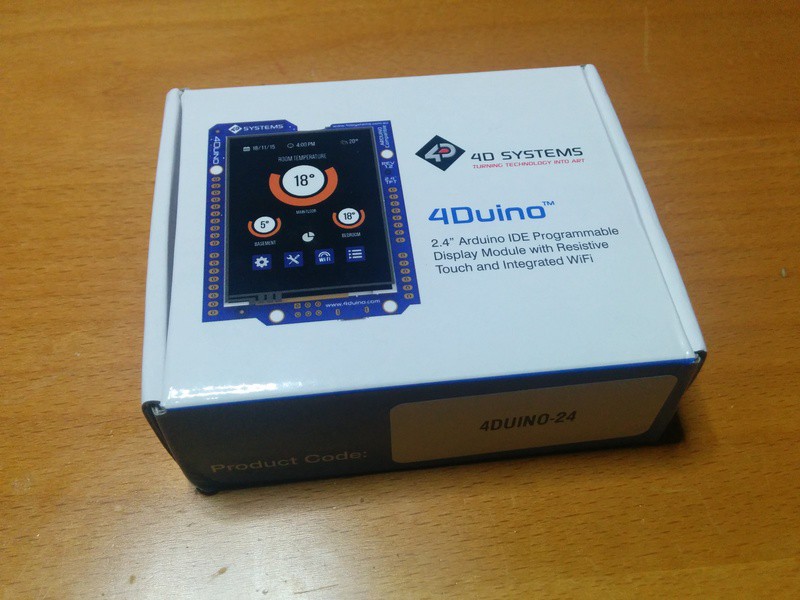
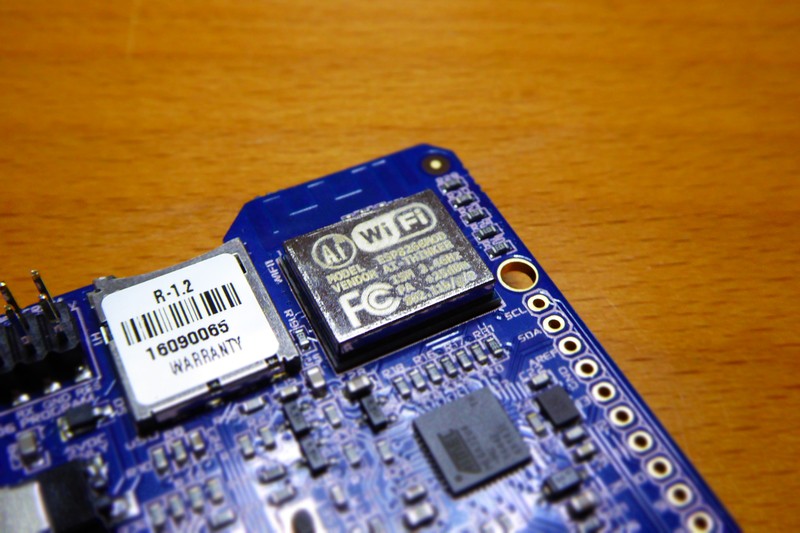
A few weeks ago the 4D Systems announced one of its latest products: the 4Duino-24, an Arduino compatible display module with built in 240x320 resolution TFT LCD Display with Resistive Touch and an ESP8266 ESP-06 module on board.
it looked like a great product for a home automation control panel, although the screen could have been bigger. Anyway I contacted the people at 4D Systems and they were kind enough to send me a sample to review, and hack!

A conversation with the tech team
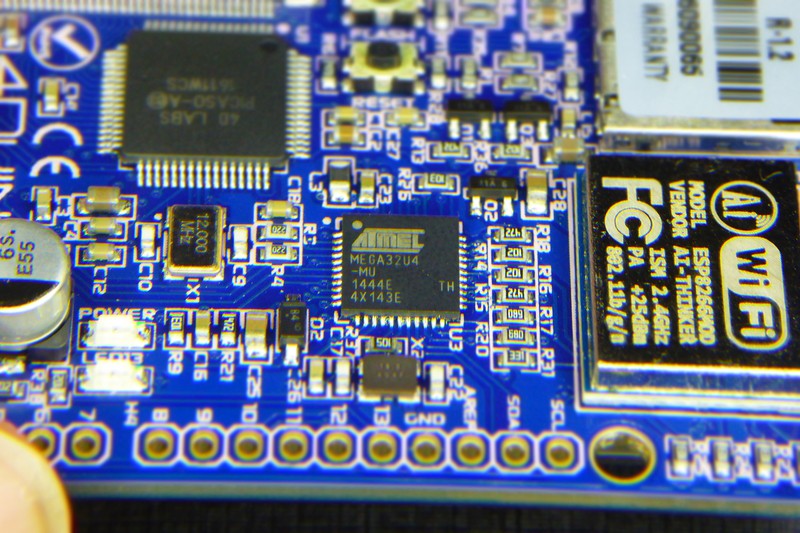
When I looked at the 4Duino-24 architecture there was something that rang a bell in my head. Well, here we have again en ESP8266 being used as a mere serial to wifi bridge.

The central microcontroller of the board is the Atmel ATmega32u4, the same one the Arduino Leonardo has. It's a good 8-bit controller but nothing compared to the ESP8266 that sits a few milimeters away.

I quickly raised an inquiry to the 4D Systems tech team and Doff Deponio, BEng. Electronics and Communication Technical Engineer at 4D Systems, responded as follows:
Well, there are all sorts of ways to look at it.
The ESP8266 is the most powerful processor, the Picaso is second and the ATmega32U4 is the least. But the ESP8266 has limited I/O, so using it as the main processor is not ‘optimal’ as it restricts users in the I/O they can add to the configuration.
The way it is designed each processor is being used in the best way to play up eachs strengths. The ESP8266 for its ability to do WiFi, Picaso for its graphics capabilities and the ATmega32U4 for its rich hardware connectivity and available code libraries.
And it makes perfect sense. Needless to say the Arduino community is the biggest by far so placing the ATmega32u4 as the main controller makes it easier for a lot more people to use the board. The ATmega32u4 has plenty of GPIOs, digital and analog, to plug your sensors and two hardware serial ports, one of them used for the USB interface and the other one to communicate with the Picaso controller that drives the display.
Still… the ESP8266 is way more powerful. And you know what? A lot of the “available code libraries” for Arduino can be ported “as is” to the ESP8266 platorm using the Arduino Core for ESP8266 project. Including 4DSystems Picaso Serial Library for Arduino.

First things first
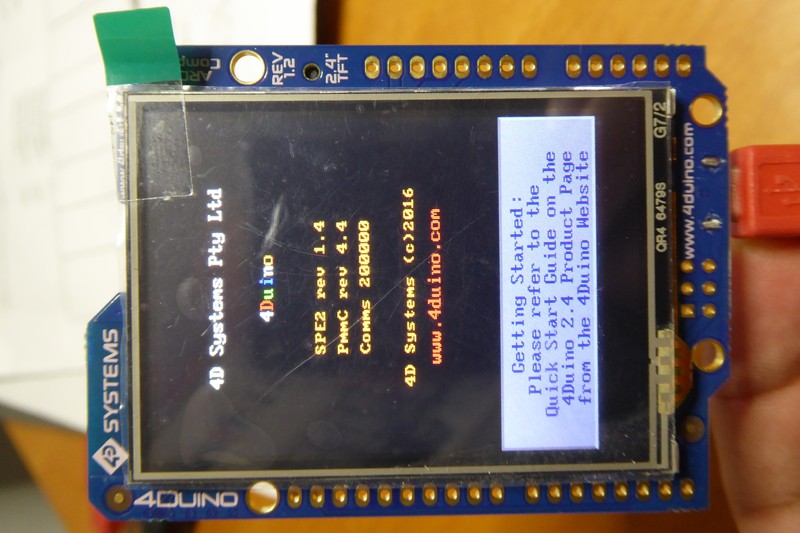
And the first thing is to test the board with the provided example code. The board is really well documented, and everything is downloadable from the product page. The most important documents to start with are:
- Quick Start Guide or what do I do with all this stuff in the box
- Datasheet or what you should know about it
- Schematic or how do things really connect between them
- Picaso Serial Command Set Reference Manual or how to talk to the display processor
- Arduino board description file that allows you to load the board in the Arduino IDE
- Picaso Serial Arduino Library or how to control your display from code
Also, you might want to check the 4D Workshop4 IDE that integrates code editing and tools to design the graphical interface of your application. It's a Windows only application (me sad) and freeware except for the PRO version (trial-ware) that integrates a code-less development environment named ViSi-Genie.

If you have been reading me you would know I'm a PlatformIO fan. It freed me from the Arduino IDE and provides a whole lot of goodies and support for tons of boards and frameworks aside from Arduino ones. It's a truly one-tool-drives-them-all!!
Flash the 4Duino-24 using PlatformIO
So my first thing was to add 4Duino support to PlatformIO. It basically comprises two steps: adding the required definitions and code the same way the Arduino IDE would do and adding an entry for the board in the Atmel AVR package for PlatformIO to know about the board.
Setting things up
The 4Duino-24 board has some specificities compared to its close cousin the Arduino Leonardo. Both have the same processor and speed but they have two small differences:
- In the Leonardo PB0 and PD5 pins in the ATmega32u4 are connected to RX and TX LEDs respectively, but on the 4Duino-24 these pins are connected to the RESET lines of the ESP8266 and the PICASO controllers
- The device has a different USB signature (VID and PID)
These two differences mean changes in the bootloader, the coreUSB libraries and the pin definitions file. So 4D Systems maintains a board description file for the Arduino IDE board manager that automates the process of downloading and installing custom files for the 4Duino-4D board. We will have to do the same.
The latest version of the board description file defines two packages for Arduino IDE versions 1.6.7 and 1.6.10. I downloaded the 4Duino-24 package for the Arduino IDE 1.6.10 and decompressed it. It contains several files and folders. This is what I did:
| action | from | to |
|---|---|---|
| copy | bootloaders/* | ~/.platformio/packages/framework-arduinoavr/bootloaders/ |
| copy | cores/* | ~/.platformio/packages/framework-arduinoavr/cores/ |
| copy | libraries/* | ~/.platformio/packages/framework-arduinoavr/libraries/core/4duino/ |
| copy | variants/* | ~/.platformio/packages/framework-arduinoavr/variants/ |
| append | boards.txt | ~/.platformio/packages/framework-arduinoavr/boards.txt |
Next add a 4duino.json file to the ~/.platformio/platforms/atmelavr/boards/ folder with these contents:
{
  "build": {
    "core": "4duino",
    "extra_flags": "-DARDUINO_ARCH_AVR -DARDUINO_AVR_4DUINO",
    "f_cpu": "16000000L",
    "hwids": [
      [
        "0x04D8",
        "0xF110"
      ]
    ],
    "mcu": "atmega32u4",
    "usb_product": "4D Systems 4Duino",
    "variant": "4duino"
  },
  "frameworks": [
    "arduino"
  ],
  "name": "4DSystems 4Duino",
  "upload": {
    "disable_flushing": true,
    "maximum_ram_size": 2560,
    "maximum_size": 28672,
    "protocol": "avr109",
    "require_upload_port": true,
    "speed": 57600,
    "use_1200bps_touch": true,
    "wait_for_upload_port": true
  },
  "url": "http://wwww.4duino.com",
  "vendor": "4D Systems"
}
And start a new project
Now I am ready to start a new project by typing:
pio init -b 4duino
The Picaso Serial Library for Arduino is already installed (comes with the 4Duino package for the Arduino IDE) and has two example sketches to help you start with it. One of them, the “BigDemo” example, requires you to format and copy some files to the SD Card but I found that it fails compiling because the resulting image is too big :(
The other example, “Display_print”, works just fine. I copied the “Display_print.ino” file to the “src” folder and:
pio run -t upload
Done :D
Doing it upside down
Now. What if I want the ESP8266 to be my main controller? It doesn't have direct access to the Picaso controller but I could use the ATmega32u4 as a bridge for the Picaso and also as a data provider for any sensors it may have attached. It can be tricky but it's doable. What do I win? A lot of power and connectivity options using the ESP8266 at full potential. What do I lose? Basically display responsiveness and speed, but depending on the product it is not noticeable at all…
The ATMega32u4 as a Man-in-the-middle
The Picaso microcontroller can be controlled through serial commands and the Picaso Serial Library encapsulates these commands in a more human-friendly API. But they are just serial data flowing up and down, so it can be easily forwarded to another destination.
One of the first examples when using an Arduino is the serial passthrough sketch:
void setup() {
  Serial.begin(9600);
  Serial1.begin(9600);
}

void loop() {
  if (Serial.available()) {      // If anything comes in Serial (USB),
    Serial1.write(Serial.read());   // read it and send it out Serial1 (pins 0 & 1)
  }

  if (Serial1.available()) {     // If anything comes in Serial1 (pins 0 & 1)
    Serial.write(Serial1.read());   // read it and send it out Serial (USB)
  }
}
That's just what we need. Easy, no? All the encoding and decoding will be done somewhere else (in the ESP8266) so the ATmega32u4 does not need to know what it is forwarding. There is one caveat, thou.
About serial speeds
I said the ATmega32u4 has two hardware serial ports, but one is already used by the USB connection, the other goes to the Picaso board and we need a third one the ESP8266. This third one will have to be a SoftwareSerial port. SoftwareSerial allows you to use almost any 2 pins as TX/RX, but since the protocol is implemented in code it's slower than its Hardware counterpart. At 57600 bauds it is reliable, but that's almost 4 times slower than the 200kbauds of the connection between the atmega32u4 and the Picaso.
Custom commands
Also, if we don't want to lose the possibilities of the plethora of GPIOs of the ATmega32u4 (and shields) we should put a mechanism in place to query them from the ESP8266. The good thing about it is that we already have one. The Picaso Serial Library. All the messages for the Picaso controller start with a 2 bytes (a word) command identifier. The first of those bytes can be 0x00, 0xFF or 0xFE. When the Picaso receives a valid message it responds with an acknowledge (0x06), an encoded response (like touch screen status or coordinates) or some kind of error.
So what if I implement my own commands and monitor the messages from the ESP8266 to the Picaso controller intercepting those that start with my own starting code? Here you have a first version of the bridge code that runs on the ATmega32u4, forwarding messages between the ESP8266 and the Picaso controller and intercepting those that start with a 0xF0. As an example the only custom command implemented allows the ESP8266 to control the builtin LED attached to GPIO 13 of the Atmel IC.
/*

4DUINO-24

Picaso Bridge Demo
ATMEGA32u4 Code

Copyright (C) 2016 by Xose Pérez <xose dot perez at gmail dot com>

This program is free software: you can redistribute it and/or modify
it under the terms of the GNU General Public License as published by
the Free Software Foundation, either version 3 of the License, or
(at your option) any later version.

This program is distributed in the hope that it will be useful,
but WITHOUT ANY WARRANTY; without even the implied warranty of
MERCHANTABILITY or FITNESS FOR A PARTICULAR PURPOSE.  See the
GNU General Public License for more details.

You should have received a copy of the GNU General Public License
along with this program.  If not, see <http://www.gnu.org/licenses/>.

*/
#include <Arduino.h>
#include <SoftwareSerial.h>

#define ESP8266_RX          8
#define ESP8266_TX          9
#define DEBUG_BAUDRATE      115200
#define ESP8266_BAUDRATE    57600
#define PICASO_BAUDRATE     200000

#define DEBUG_SERIAL        Serial
#define PICASO_SERIAL       Serial1
#define ESP8266_SERIAL      EspSerial

#define ESP_RESET_PIN       17
#define PICASO_RESET_PIN    30

#define COMMAND_LENGTH      3
#define COMMAND_HEADER      0xF0
#define COMMAND_LED_STATUS  0x01
#define RESPONSE_ACK        0x06
#define RESPONSE_ERROR      0x01

SoftwareSerial EspSerial(ESP8266_RX, ESP8266_TX);
boolean header = true;
uint8_t position = 0;
uint8_t command[COMMAND_LENGTH];

// -----------------------------------------------------------------------------
// UTILS
// -----------------------------------------------------------------------------

void reset(uint8_t pin) {
    pinMode(pin, OUTPUT);
    digitalWrite(pin, HIGH);
    delay(100);
    digitalWrite(pin, LOW);
}

// -----------------------------------------------------------------------------
// LOCAL COMMANDS
// -----------------------------------------------------------------------------

void commandLoop() {

    // All builtin commands are 3 bytes long (including the 0xF0 header)
    if (position != COMMAND_LENGTH) return;

    // Check command signature
    switch (command[1]) {

        // led_Status
        case COMMAND_LED_STATUS:

            // Set the LED
            digitalWrite(LED_BUILTIN, command[2]);

            // send ACK like a PICASO command
            ESP8266_SERIAL.write(RESPONSE_ACK);

            break;

        default:

            // send ERROR
            ESP8266_SERIAL.write(RESPONSE_ERROR);

            break;

    }

    // reset buffer position
    position = 0;
    header = true;

}

// -----------------------------------------------------------------------------
// SERIAL BRIDGE
// -----------------------------------------------------------------------------

void serialLoop() {

    // Request from the ESP8266
    if (ESP8266_SERIAL.available()) {

        // Intercept message
        uint8_t data = ESP8266_SERIAL.read();

        // Debug messages
        #if DEBUG
            if (header) DEBUG_SERIAL.println();
            char b[3];
            sprintf(b, "%02X\0", data);
            DEBUG_SERIAL.print(b);
        #endif

        // If it is a new message and the header matches 0xF0
        // or it's a message already flagged as mine,
        // the process it locally
        if ((position > 0) || (header && (data == COMMAND_HEADER))) {

            // Buffer the message
            command[position++] = data;

        // else it's for the PICASO controller
        } else {

            // Forward it to the PICASO controller
            PICASO_SERIAL.write(data);

        }

        // Flag the forecoming bytes as not new
        header = false;

    }

    // Response from the PICASO controller
    if (PICASO_SERIAL.available()) {

        // Forward message to ESP8266
        ESP8266_SERIAL.write(PICASO_SERIAL.read());

        // Ready for a new command
        header = true;

    }

}

// -----------------------------------------------------------------------------
// SETUP & LOOP
// -----------------------------------------------------------------------------

void setup() {

    #if DEBUG
        DEBUG_SERIAL.begin(DEBUG_BAUDRATE);
    #endif

    PICASO_SERIAL.begin(PICASO_BAUDRATE);
    ESP8266_SERIAL.begin(ESP8266_BAUDRATE);

    pinMode(LED_BUILTIN, OUTPUT);
    digitalWrite(LED_BUILTIN, LOW);

    reset(PICASO_RESET_PIN);
    reset(ESP_RESET_PIN);

}

void loop() {
    serialLoop();
    commandLoop();
}
As a note aside: you may have noticed that when the sketch starts it resets the Picaso AND the ESP8266…
Running the Picaso Serial Library on the ESP8266
This section might look a bit empty but, actually, there is nothing to say. It just compiles and works without modifications.
Extending the Picaso Serial Library
Now on the ESP8266 side I just have to copy the Display_print.ino example and run it. If I want to use the custom command I implemented in the ATmega32u4 side I could just send it manually but extending the Picaso Serial Library is a more elegant option.
So I created a Picaso Bridge LIbrary that extends the Picaso Serial Library adding the new commands. This is what the “Picaso_Bridge.h” file looks like:
/*

Picaso Bridge

This library extends Picaso_Serial_4DLib by 4D Systems
with custom commands that can be interpreted by a
MIM microcontroller like the atmega32u4 in the 4Duino24

Copyright (C) 2016 by Xose Pérez <xose dot perez at gmail dot com>

This program is free software: you can redistribute it and/or modify
it under the terms of the GNU General Public License as published by
the Free Software Foundation, either version 3 of the License, or
(at your option) any later version.

This program is distributed in the hope that it will be useful,
but WITHOUT ANY WARRANTY; without even the implied warranty of
MERCHANTABILITY or FITNESS FOR A PARTICULAR PURPOSE.  See the
GNU General Public License for more details.

You should have received a copy of the GNU General Public License
along with this program.  If not, see <http://www.gnu.org/licenses/>.

*/

#ifndef _PICASO_BRIDGE_H_
#define _PICASO_BRIDGE_H_

#include <Picaso_Serial_4DLib.h>

//------------------------------------------------------------------------------
// Custom commands
//------------------------------------------------------------------------------

#define F_led_Status            0xF001

//------------------------------------------------------------------------------
// Library declarations
//------------------------------------------------------------------------------

class Picaso_Bridge : public Picaso_Serial_4DLib {

    public:

        Picaso_Bridge(Stream * virtualPort) : Picaso_Serial_4DLib(virtualPort) {};
        void led_Status(bool status);

};

#endif
And here the code (Picaso_Bridge.cpp):
/*

Picaso Bridge

This library extends Picaso_Serial_4DLib by 4D Systems
with custom commands that can be interpreted by a
MIM microcontroller like the atmega32u4 in the 4Duino24

Copyright (C) 2016 by Xose Pérez <xose dot perez at gmail dot com>

This program is free software: you can redistribute it and/or modify
it under the terms of the GNU General Public License as published by
the Free Software Foundation, either version 3 of the License, or
(at your option) any later version.

This program is distributed in the hope that it will be useful,
but WITHOUT ANY WARRANTY; without even the implied warranty of
MERCHANTABILITY or FITNESS FOR A PARTICULAR PURPOSE.  See the
GNU General Public License for more details.

You should have received a copy of the GNU General Public License
along with this program.  If not, see <http://www.gnu.org/licenses/>.

*/

#include "Picaso_Bridge.h"

void Picaso_Bridge::led_Status(bool status) {
    _virtualPort->write((char)(F_led_Status >> 8));
    _virtualPort->write((char)(F_led_Status));
    _virtualPort->write(status ? 1 : 0);
    GetAck();
}
Simple and elegant. I like it! Only one thing. For this wrapper library to work I had to do a minor change to the Picaso Serial Library. I had to change the private methods to protected, so I could use them from the inherited class.
Now I can just copy any code meant for the ATmega32u4 and use my own commands:
/*

4DUINO-24

Picaso Bridge Demo
ESP8266 Code

Xose Pérez <xose dot perez at gmail dot com>
based on example code by 4D Systems

This program is free software: you can redistribute it and/or modify
it under the terms of the GNU General Public License as published by
the Free Software Foundation, either version 3 of the License, or
(at your option) any later version.

This program is distributed in the hope that it will be useful,
but WITHOUT ANY WARRANTY; without even the implied warranty of
MERCHANTABILITY or FITNESS FOR A PARTICULAR PURPOSE.  See the
GNU General Public License for more details.

You should have received a copy of the GNU General Public License
along with this program.  If not, see <http://www.gnu.org/licenses/>.

*/

#include <Picaso_Bridge.h>

#define DISPLAY_SERIAL          Serial
#define SERIAL_BAUDRATE         57600
#define DISPLAY_CHECK_INTERVAL  100

// Using my Picaso_Bridge class here
Picaso_Bridge Display(&DISPLAY_SERIAL);

word buttonState = BUTTON_UP;
word x, y;

// -----------------------------------------------------------------------------
// DISPLAY
// -----------------------------------------------------------------------------

void mycallback(int ErrCode, unsigned char Errorbyte) {}

void displaySetup() {

    Display.Callback4D = mycallback;
    Display.TimeLimit4D = 5000;
    DISPLAY_SERIAL.begin(SERIAL_BAUDRATE);

    // Required for the display to warm up (!!)
    delay(5000);

    Display.touch_Set(TOUCH_ENABLE);
    Display.gfx_ScreenMode(PORTRAIT);
    Display.gfx_Cls();

    Display.gfx_Button(buttonState, 20, 40, GRAY, WHITE, FONT3, 3, 3, (char *) "Press Me");
    Display.txt_Width(2);
    Display.txt_Height(2);
    Display.gfx_MoveTo(10,120);
    Display.putstr((char *) "LED State: OFF");

}

void displayLoop() {

    // We are checking the status every 100ms
    static unsigned long last = 0;
    if (millis() - last < DISPLAY_CHECK_INTERVAL) return; last = millis(); byte state = Display.touch_Get(TOUCH_STATUS); if ((state == TOUCH_PRESSED) || (state == TOUCH_MOVING)) { x = Display.touch_Get(TOUCH_GETX); y = Display.touch_Get(TOUCH_GETY); } if (state == TOUCH_RELEASED) { if ((x >= 20) && (x <= 220) && (y >= 40) && (y <= 100)) {

            buttonState = !buttonState;
            Display.gfx_MoveTo(10,120);

            // If button state is pressed
            if (buttonState == BUTTON_UP) {
                Display.gfx_Button(buttonState, 20, 40, GRAY, WHITE, FONT3, 3, 3, (char *) "Press Me");
                Display.putstr((char *) "LED State: OFF");
            } else {
                Display.gfx_Button(buttonState, 20, 40, RED, WHITE, FONT3, 3, 3, (char *) "Press Me");
                Display.putstr((char *) "LED State: ON ");
            }

            // Calling my custom command to change the LED state
            Display.led_Status(buttonState == BUTTON_DOWN);

        }

    }

}

// -----------------------------------------------------------------------------
// SETUP & LOOP
// -----------------------------------------------------------------------------

void setup() {
    displaySetup();
}

void loop() {
    displayLoop();
    delay(5);
}
Flash it and enjoy. Two things about flashing the ESP-06 module in the 4Duino-24. First remember that even thou the ESP8266 is a 3V3 IC the programming connector brings out the 5V line, so connect it to a 5V supply. Second: once flashed disconnect the RX line, I noticed that it runs unbearably slow if connected.

There is a lot of work to do but the foundations are there. You can use the 4Duino-24 the original way or you can do it upside down.
"4Duino-24 upside down" was first posted on 20 September 2016 by Xose Pérez on tinkerman.cat under Analysis, Code, Hacking and tagged 4d systems, 4duino-24, atmega32u4, display, esp8266, leonardo, picaso, platformio, softwareserial.