Magic Home LED Controller ESPurna'd
Following the bright path (sic) of the Ai-Thinker AiLight / Noduino OpenLight I wrote about a few weeks ago, now it's turn for one of those devices you purchase but once they arrive they are stored in the TODO box until they eventually come back to life.
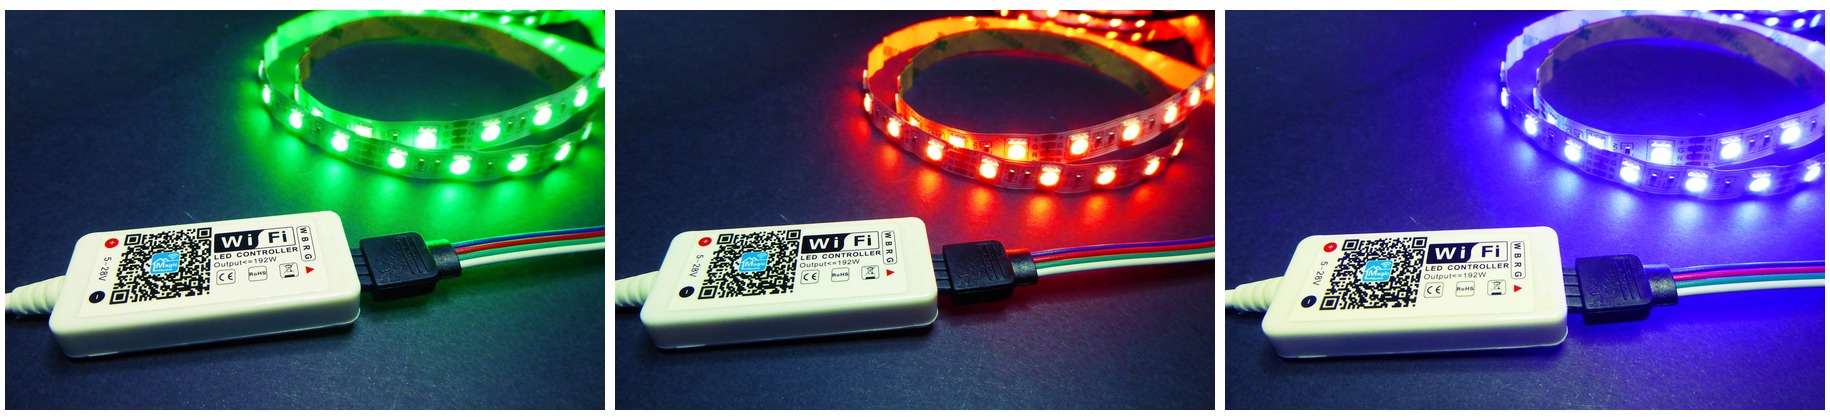
The Magic Home LED Controller [Aliexpress, also available from Ebay] is an ESP8266 based single-color RGB(W) LED strip controller. It works with every 5050 LED strip [Aliexpress] out there. Just be careful since even thou some LED strips are waterproof [Aliexpress] this controller is not.
Being able to flash custom firmware in the controller lets you really own the device. Why? Because:
- You are not required to install a proprietary app on you phone to manage it
- You are not limited by the options the developers of that app have decided you will need
- You can make it interoperate with other devices at home
- You, and only you, know when you turn on your lights
- And if all the previous points are not enough: it's so much fun!
Getting the hardware ready
Just like in the Ai Light, flashing any custom firmware into this controller will require you to solder some wires to small copper pads on the board. It's not hard but it's one of those things you learn by doing. Just to get you started let me give you some advice that work for me:
- Use a thin tip
- Ensure it's hot before starting, I usually set it to 350 celsius
- Heat the pads one by one and apply a little blob of tin
- Remove 1-2 mm of insulator from the cables
- Tin the cable too
- Make contact between the pads and the cable tips and apply heat again to reflow the tin for less than one second
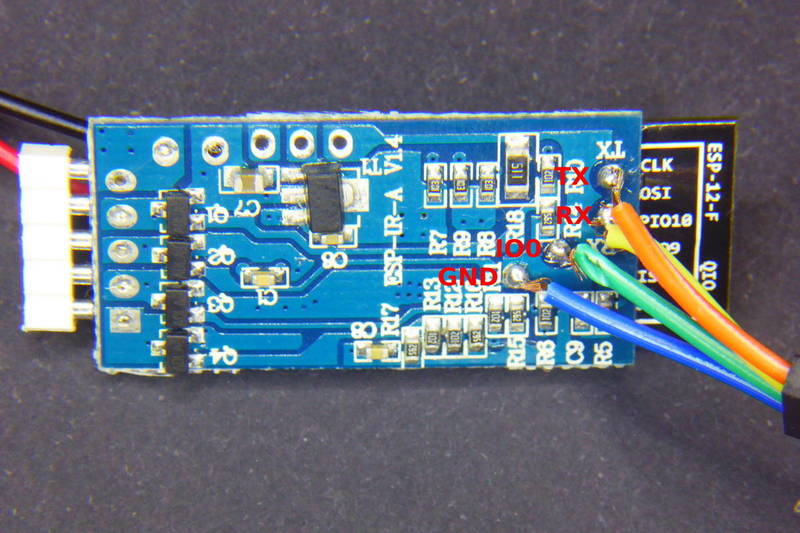
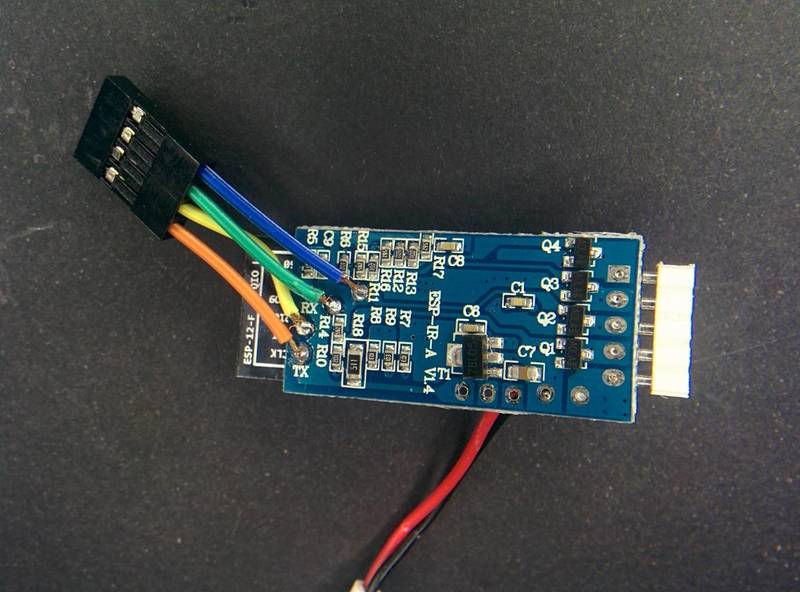
Connect the wires to your USB2UART programmer as in the picture above, GND to GDN, TX to RX and RX to TX. Tie IO0 to ground to enter flash mode and power the board through the original jack. If you are going to flash and test several times, remember to disconnect and connect IO0 from ground every time. Booting while IO0 is tied to ground makes it enter into flash mode, otherwise it's normal boot mode.
Also, once you have an OTA compatible firmware loaded you might want to remove the wires (again, apply some heat) and flash new versions over the aire from then on.
Flashing ESPurna
The ESPurna firmware is released as **free open software **and can be checked out at my Espurna repository on GitHub.
I strongly recommend everyone to use PlatformIO to build and flash their ESP8266 projects (and their Arduino projects, and their STM32 projects,…). You can either use the command line version of PlatformIO or the PlatformIO IDE based on Atom. Either way** the builder will take care of all the project dependencies** (frameworks, toolkits, libraries,…). You just have to checkout the project from the link above, open the “code” folder with the IDE (or “cd” to it) and run the builder for your target board. In the PlatformIO IDE that's done pressing F7 and selecting “PlatformIO: Upload (env:led-controller-debug)".
Using the command line this translates into:
git clone http://github.com/xoseperez/espurna
cd espurna/code
pio run -e led-controller-debug -t upload
Upon reboot the blue LED in the board will flash every half second and it will create an access point named something like “LED_CONTROLLER_ABCDEF”, connect to it using “fibonacci” as password and then open a browser pointing to 192.168.4.1. It will ask you for authentication. Use user “admin” and pass “fibonacci” again.
The first time you will have to change the default password and login again. Then I recommend you to change the hostname (say you will call it “ledstrip”), and the wifi credentials for your home network. Then press reconnect and it will connect to your WiFi using the credentials you just provided.
When connected to a WiFi the builtin led flashes briefly every five seconds. Then you can just browse to “http://ledstrip.local" (“ledstrip” is the hostname you set in the previous step) to go back to the web interface.
Using ESPurna
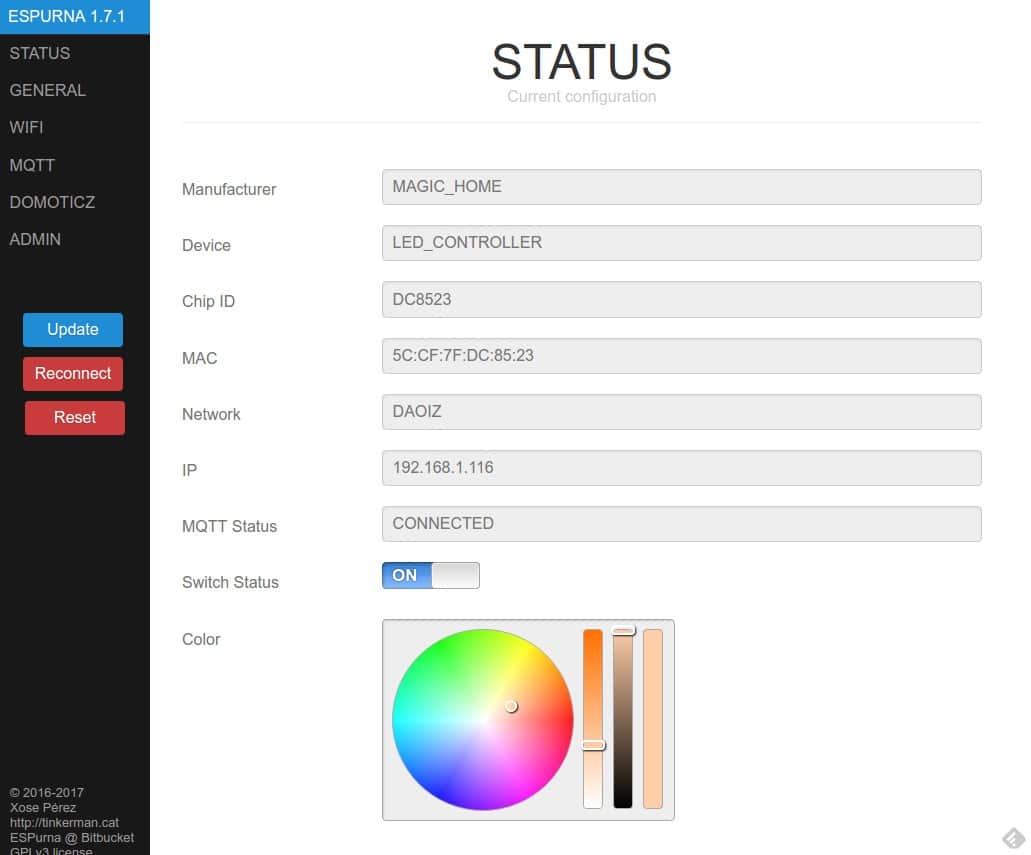
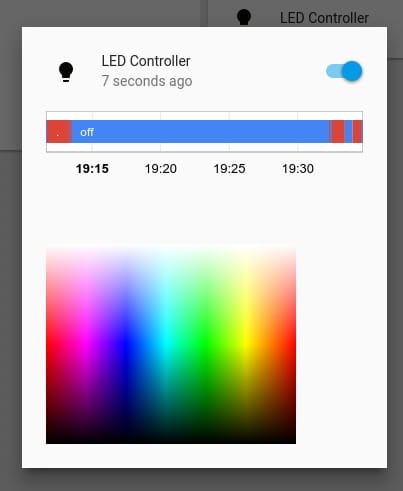
The ESPurna web interface lets you control the status of the lights (on/off) and the color, but it also lets you configure the access to other services like MQTT, the REST API, Home Assistant,…
If you have a local MQTT broker you can connect ESPurna to it (check the MQTT tab in the menu) and start changing color and status remotely right away:
# turns on the light
mosquitto_pub -t /home/ledstrip/relay/0 -m 1

# turns off the light
mosquitto_pub -t /home/ledstrip/relay/0 -m 0

# toggles the light
mosquitto_pub -t /home/ledstrip/relay/0 -m 2

# Changes color to red using #RRGGBB notation
mosquitto_pub -t /home/ledstrip/color -m "#FF0000"

# Changes color to red using R,G,B notation (only in dev branch as of this writing)
mosquitto_pub -t /home/ledstrip/color -m "255,0,0"

# Changes color using temperature (only in dev branch as of this writing)
mosquitto_pub -t /home/ledstrip/color -m "6500K"
Using the REST API is a little more involved since you have to use the APIKEY provided in the web interface for every request, but still it's really simple and something you can test from the browser (it's actually REST-ish since it accepts GET requests to change statuses).
# URL to turn light on
http://192.168.1.116/api/relay/0?apikey=8110583A5A524DBD&value=1

# URL to turn light off
http://192.168.1.116/api/relay/0?apikey=8110583A5A524DBD&value=0

# URL to turn toogle light
http://192.168.1.116/api/relay/0?apikey=8110583A5A524DBD&value=2

# URL to change color to RED using #RRGGBB notation (notice the '#' is encoded as '%23')
http://192.168.1.116/api/color?apikey=8110583A5A524DBD&value=%23FF0000

# URL to change color to RED using R,G,B notation (only in dev branch as of this writing)
http://192.168.1.116/api/color?apikey=8110583A5A524DBD&value=255,0,0

# URL to change color using temperature (only in dev branch as of this writing)
http://192.168.1.116/api/color?apikey=8110583A5A524DBD&value=6500K
Finally you can also use Home Assistant to change the color and status of the light using the MQTT Light component. The plan is to support MQTT JSON Light component also, to change status, color, brightness, temperature and adding effects to the lights. Soon!
"Magic Home LED Controller ESPurna'd" was first posted on 02 April 2017 by Xose Pérez on tinkerman.cat under Projects, Tutorial and tagged esp8266, espurna, home assistant, led controller, led strip, magic home, mqtt, platformio, rest, smd5050.