Fenderino, the coolest guitar
Last February 7 I attended a workshop at a the SokoTech in Barcelona to assemble my own Fenderino, the coolest guitar ever (my knowledge about guitars is very limited, so take this sentence with a grain of salt).
The guitar is actually a shield for the Arduino UNO and has been designed by the people at abierto.cc, an initiative aimed to provide open(-sourced) tools for educators, created amongst others, by David Cuartielles, co-founder of Arduino. The shield is inspired by the works of two very good friends of mine: Marc Sibila (@marcsibila) and Jordi Divins (@jdivins). You really should be following these guys, they are doing very special things as Instròniks.
The Fenderino
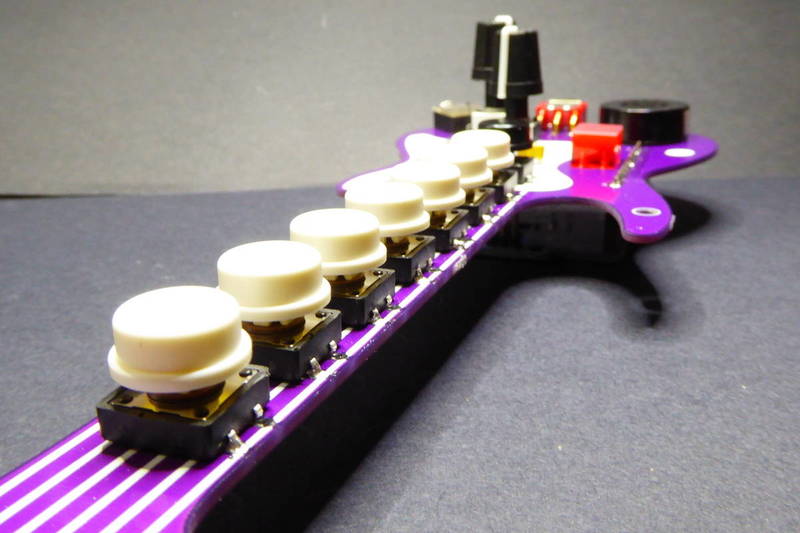
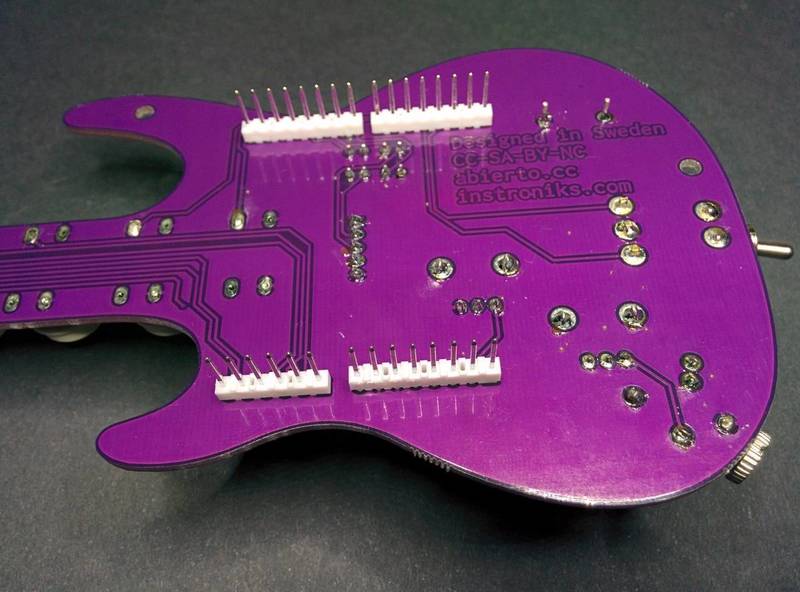
The shield itself is a beauty.
The shape resembles a Fender Stratocaster and the purple colors would appeal Prince himself. But that's not everything. A few details make it really shine. The 4 LED brick for the visual notifications is one of those components you invent a project just to be able to use them. The item is a KINGBRIGHT L-875/4IDT and Cuartielles pointed me to the only source I have found for it: farnell.com. It sells for 1.34€ a piece.
The other detail that really stands out is the common cathode 4x 200ohm resistor array. Not as uncommon as the LED array, it limits the current to the LEDs on the array but it doubles as the bridge of the guitar. Nice detail.
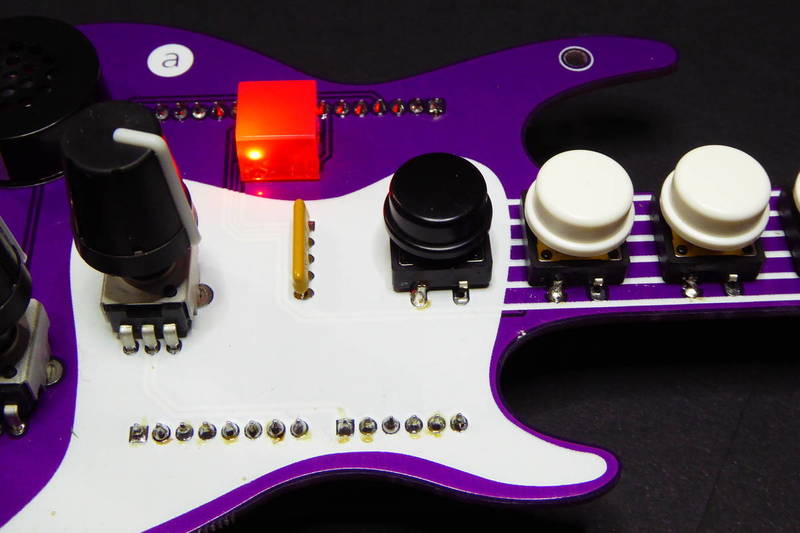
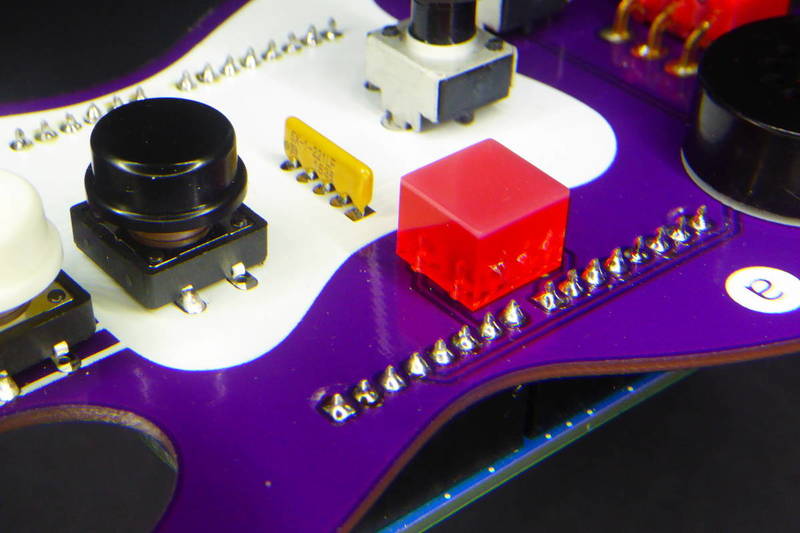
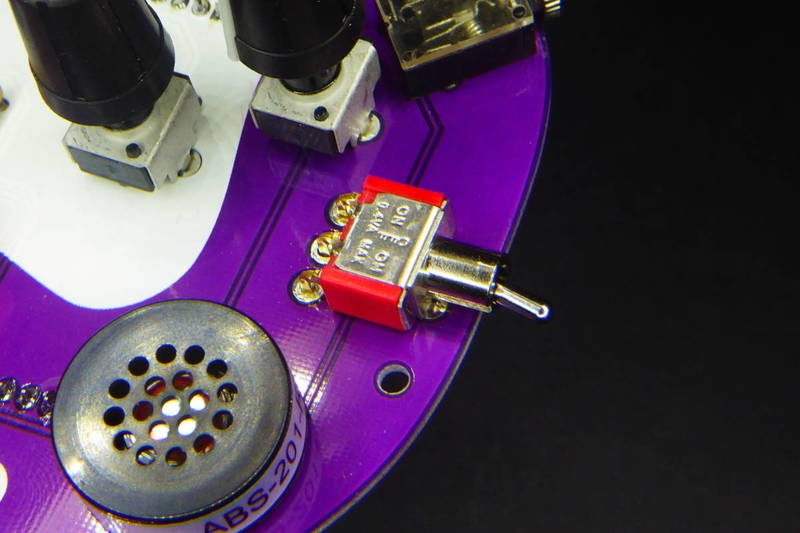
The 9 buttons cover a complete octave plus one note (from C to C) and the two potentiometers are used in the sample sketches to change the octave (actually the pitch of the first button) and the volume. There is also a handy 3 positions switch to use different configurations.
Finally the output can be the builtin high quality buzzer or your headphones (or you HiFi system) connected to the 3.5mm jack out.
Open Source Software & Hardware
On the workshop we had the opportunity to test different sample sketches, from very simple ones to test the welding connections to scales, polyphonic sounds and a simple but amazing voice synthesizer using the Talkie library by Peter Knight.
Hardware files (KiCAD) and sketches for the Fenderino will be open source. They are not yet available but Cuartielles confirmed me this point just yesterday. As you can see the hardware is licensed CC-SA-BY-NC so basically you can copy and modify it as long as you do proper attribution and you use the same license and don't make profit out of it.
Talking MIDI
Playing the guitar was so fun from the very first moment! I was eager to contribute somehow to the project.
At home, we got a new keyboard piano for Christmas and we had it connected to a tablet with the Synthesia app to learn to play some songs. It had been my first contact with the MIDI interface and I had that feeling I could do some fun projects with it. So I started looking at how to turn the Arduino into a MIDI device.
As it turns out, adding MIDI to a USB-capable microcontroller with Arduino is very easy. There are several libraries available. Mainly the MIDIUSB by Gary Grewal & Arduino. But you have to have an USB capable Arduino, like the Leonardo. What if you want to use a Uno?
The Arduino UNO has a second microcontroller on board that handles the USB communications. An Atmel ATMega8u2 or ATMega16u2. That controller talks USB to UART only. But the good thing is that it is a programmable microcontroller (at least in the official Unos, counterfeits sometimes use an FTDI chip or alike which is not reprogrammable).
What we need is to flash that helper microcontroller with a firmware that talks MIDI. Well, there is an open source project that does just that: the HIDUINO. The HIDUINO project “(…) provides a true USB-MIDI device for plug-and-play compatibility on Windows, OSX, and Linux - just like a commercial MIDI controller”. Sounds good.
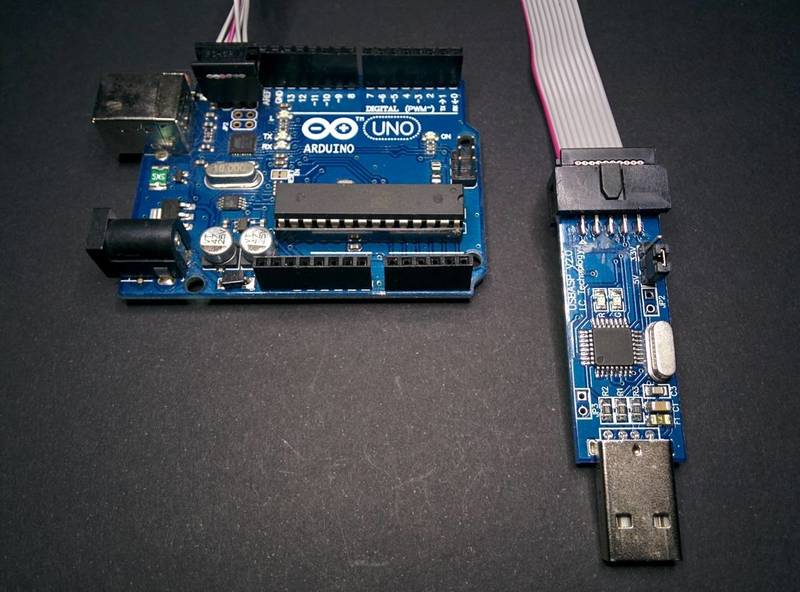
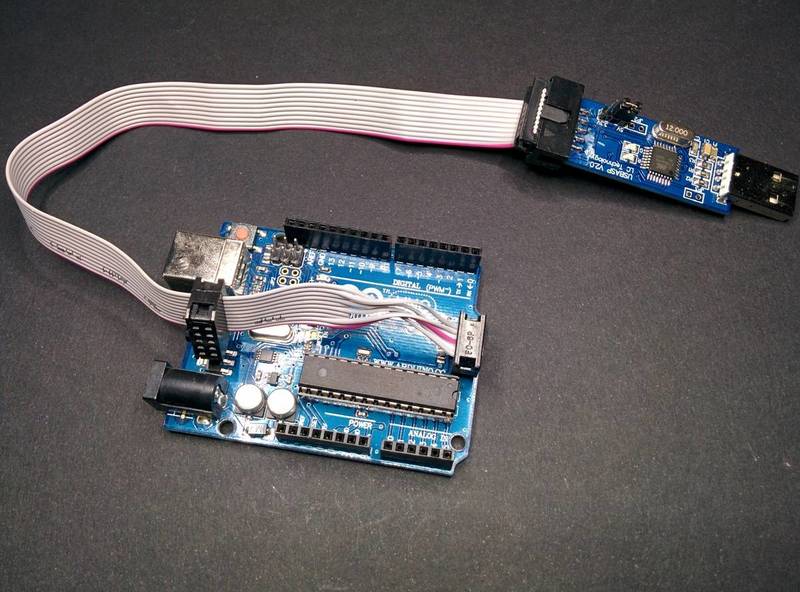
There are two drawbacks. First you will need an AVR programmer to flash the HIDUINO firmware into the ATMega16u2. There is an ISP header just by the microcontroller to do so.
Second you will need a AVR programmer to flash the ATMega328P from then on since the USB handler IC is no longer doing its job as USB to UART bridge. Actually you only need one AVR programmer so it's not that much hustle and you can always flash the original firmware for the ATMega16u2 and get back your Arduino UNO.
To flash the ATMega16u2, first checkout the HIDUINO project and grab the arduino_midi.hex file in the compiled_firmwares folder. Connect your programmer like in the pic below. I'm using an USBASP v2.0 [Aliexpress] here with a 10-pin to 6-pin flat cable, an AVRISPMKII [Aliexpress] will also do. To flash it the fast is to call avrdude from the command line (you might need to specify absolute paths for the avrdude binary or config file):
avrdude -v -p atmega16u2 -C avrdude.conf -c usbasp -Pusb -F -U flash:w:arduino_midi.hex -U lfuse:w:0xFF:m -U hfuse:w:0xD9:m -U efuse:w:0xF4:m -U lock:w:0x0F:m
Flashing the sketch is very similar, you can do it from the IDE but again it will be faster to do it from the console:
avrdude -v -p atmega328p -C avrdude.conf -c usbasp -Pusb -U flash:w:firmware.hex:i
Check the image to connect the 6-pin flat cable in the right orientation.
Firmware
The Fenderino MIDI sketch will probably be available as an example from the abierto.cc repository. But if you are curious you can check my repo with only the MIDI example I had worked on.
The Fenderino MIDI sketch is released under the GPLv3 license and can be checked out at my Fenderino MIDI repository on Github.
And play!

You can now buy the Fenderino shield from the abierto.cc store.
"Fenderino, the coolest guitar" was first posted on 23 April 2017 by Xose Pérez on tinkerman.cat under Analysis, Code and tagged abierto.cc, arduino, david cuartielles, farnell, fender stratocaster, fenderino, hiduino, instroniks, jordi divins, kicad, kingbright, l-875 4Idt, led array, marc sibila, midi, midiusb, resistor array, sokotech, talkie, usbasp.