AiLight - A hackable RGBW light bulb
Some weeks ago a tweet by Manolis Nikiforakis (@niki511) with the #ESP8266 hashtag drew my attention. Manolis had just received a “smart lamp” branded by Ai-Thinker, the AiLight. Yes, the same Ai-Thinker that has sold millions of ESP8266 based modules. Chances were it had an ESP8266 microcontroller inside. Too good not to buy one and take a look at the inside.
Manolis shared the link where he bought his at Ebay for a bit more than USD 10 plus shipping. Unfortunately it's out of stock there and there are amazingly few other places where you can buy it. I only found the same product with prices around USD 15-18 at Ebay as ESP8266 Smart Home Wifi RGB LED Light [Ebay] or Noduino Open Light LED Smart Bulb [Ebay] also in a cheaper pack of two light bulbs [Ebay]. You can also find it at Aliexpress sold as “DIY Wifi LED Bulb E27 5W AC110-240V lampada LED Dimmable Bulb Lamp Remote Control Led Spot Light for iPhone Android Phones” [Aliexpress]. Don't you love those seo-ugly names?
I actually bought two because you never know. And they arrived last Thursday. It took me less that 1 minute to open one of the boxes, pop out the cap and take a look at the inside just to see what I already knew. Time to play :)
Some pics to start
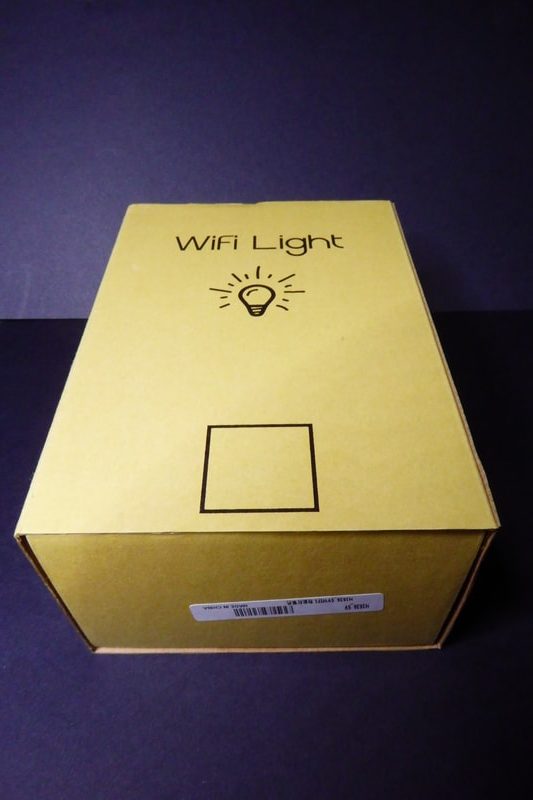
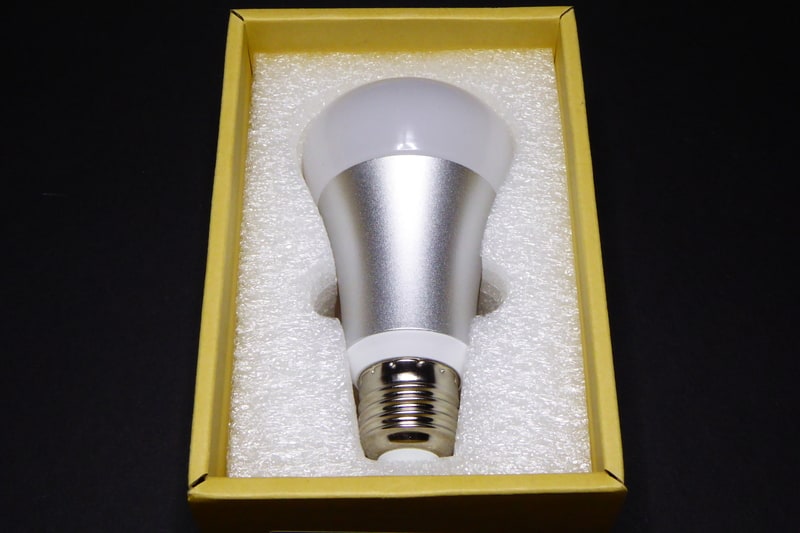
I'm not good or fond of “unboxings” but since it's a hard to find product I might add here some pics of the boxing and the light bulb.
Each light bulb comes in a light brown box (149x105x67mm if you ask) labelled “WiFi Light” on both faces and with a light bulb pic and a mysterious empty square (?). Looks like a place to mark the variation (they sell them in silver and gold finish), but the sticker with the color is actually on the other side of the box…
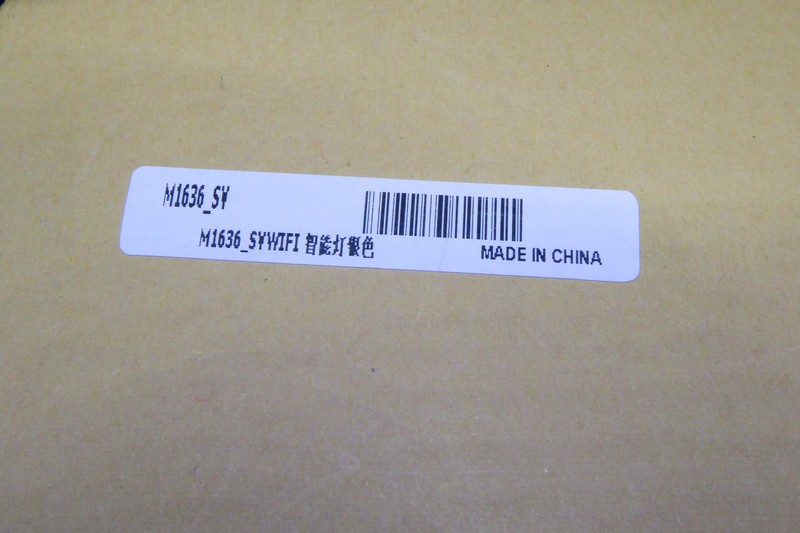
There is a label on the bottom of the box with the legend “M1636_SVWIFI” and the usual “Made in China”. I guess SV means “silver” so the model would be “M1636” (I actually found some of the references above looking for this model number).
Inside the box there is a simple two fold paper with Chinese instructions to download the app to control the device on your cellphone. Two things to note: first the funny guy pictured in the paper. I'm not much into Chinese culture but he looks like a 60yo nerd. And then the baseline “If you are not an engineer”. What does it mean? Maybe they meant it's a product for everybody, you don't need to be an engineer. Or maybe it's a “use the provided app unless you plan to hack it”?


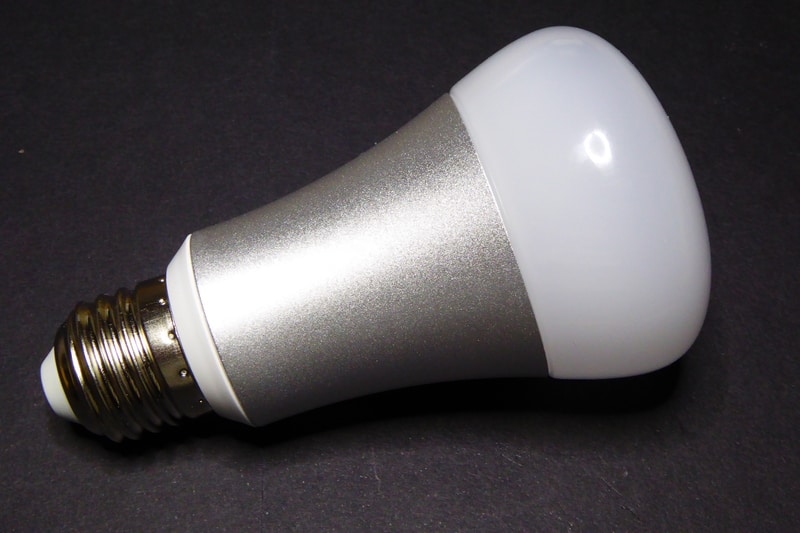
And finally the light bulb it's a copy of the Philips Hue [Amazon] without the logo, with WiFi instead of Zigbee and at a fraction of the price.
Taking a closer look
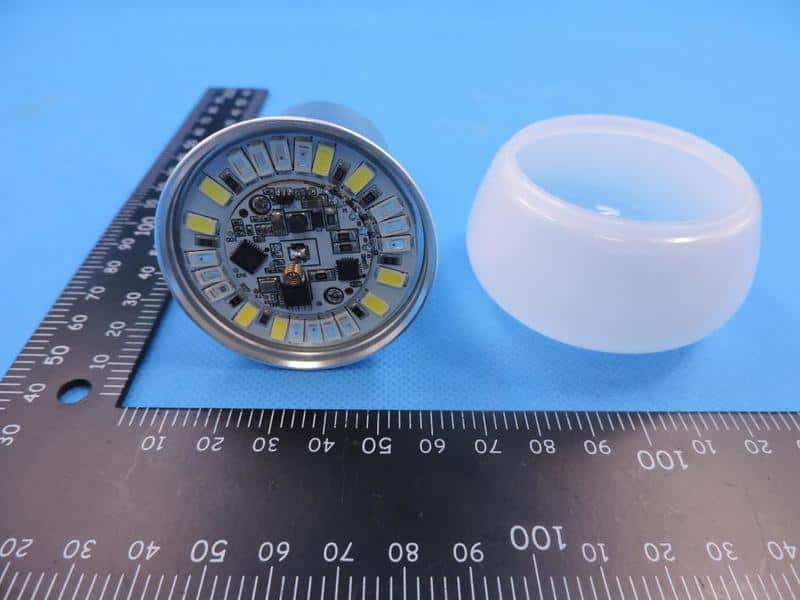
The bulb cap is not glued, it just fits in. Just pull with a bit of strength and it will pop out. After removing it you have full access to the PCB.
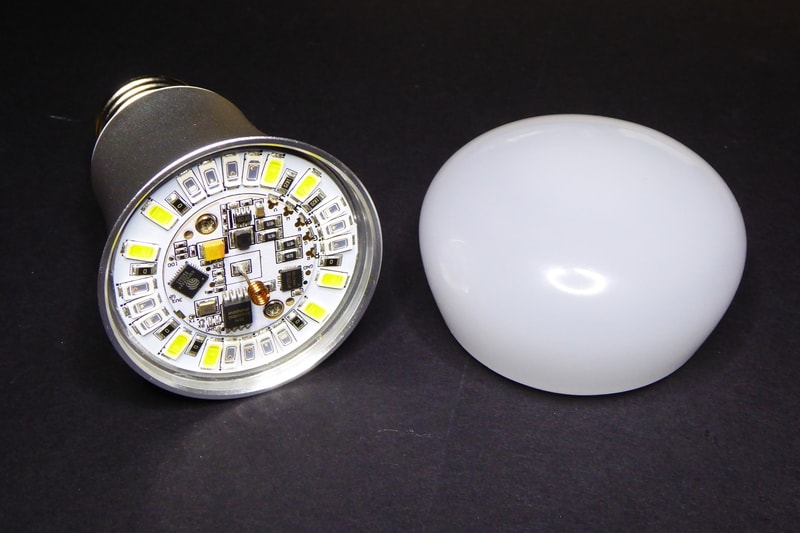
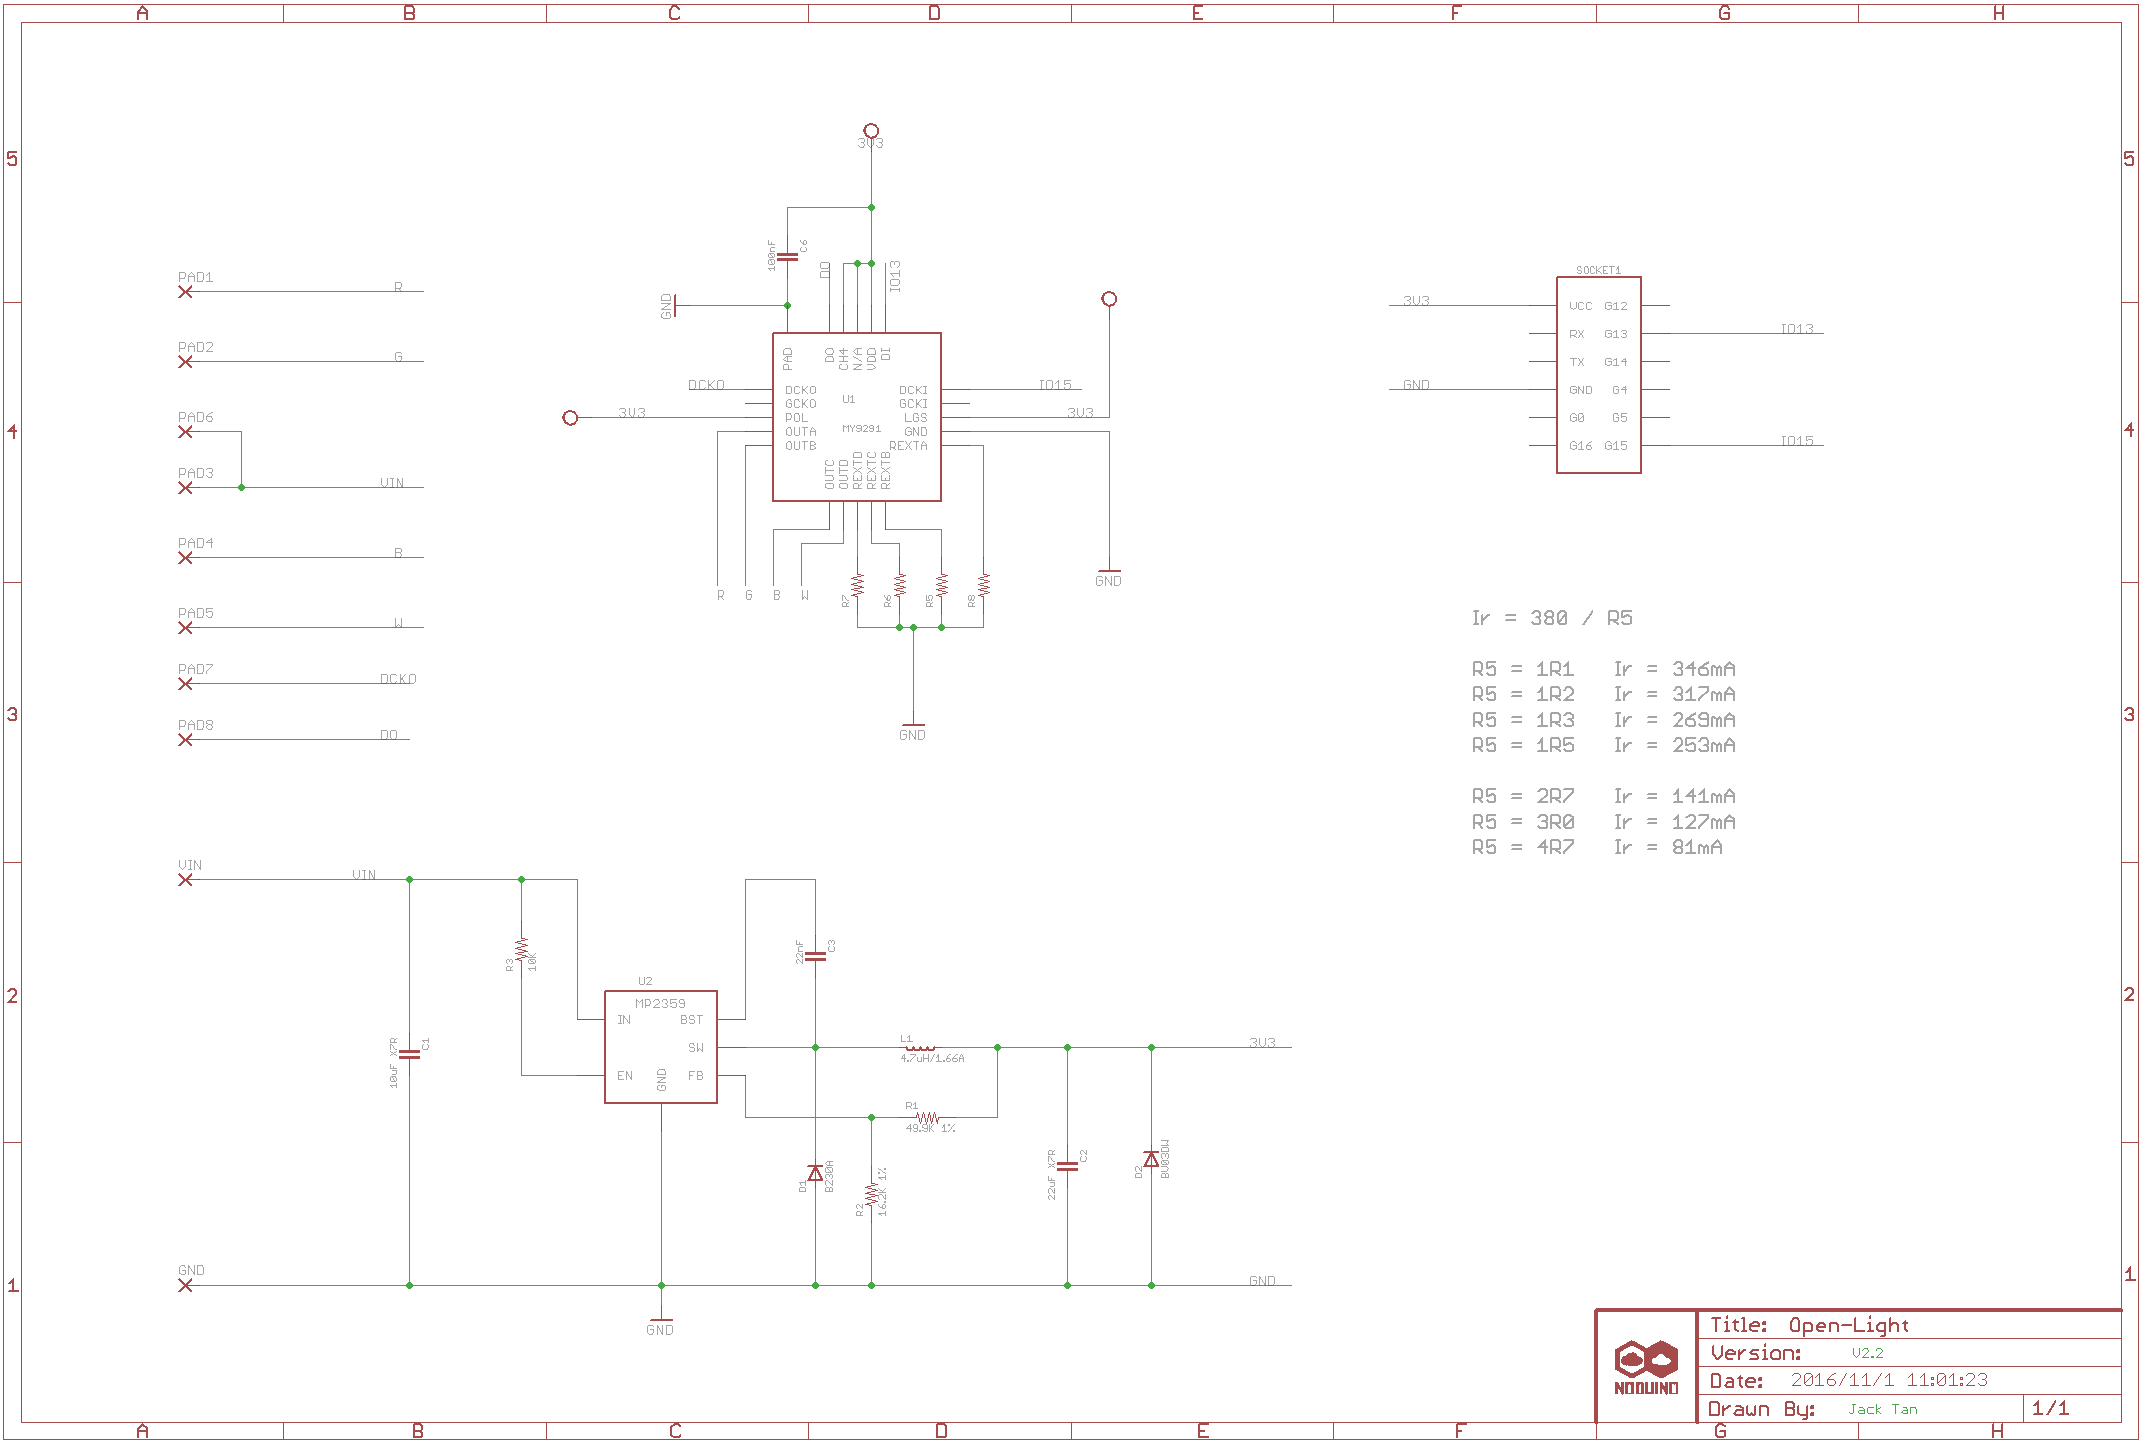
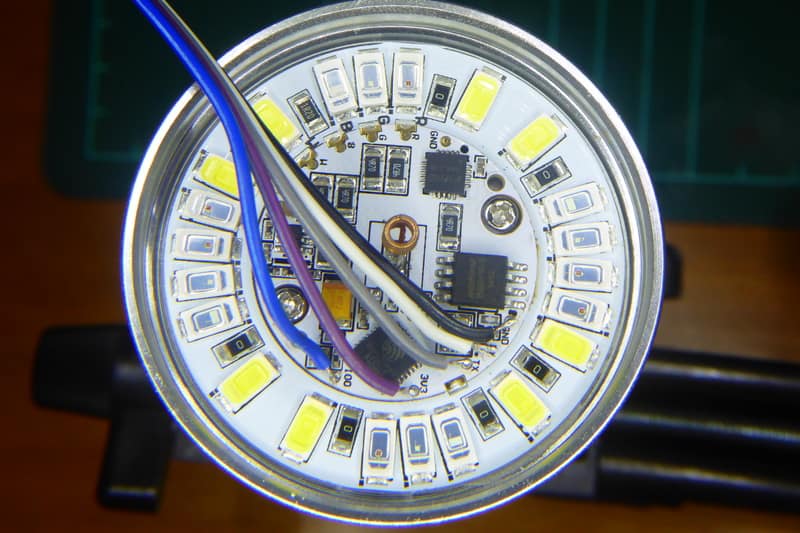
The PCB it's actually 2 PCBs. The outer one has 8 high power white LEDs, 6 red LEDs, and 4 blue and 4 green LEDs. The inner PCB holds the logic circuit with an ESP8266EX microcontroller and a Winbond 25Q80BVSIG 1MByte flash memory chip. These are the usuals suspects. There is also a SOT23-6 package labelled ADJG and a 20 pin IC labelled MY9291QD.
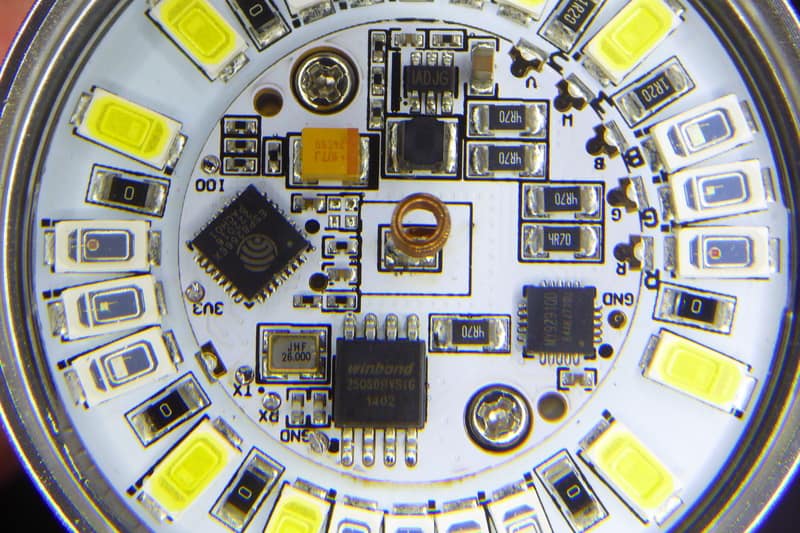
There are also 5 pads labelled 3V3, GND, RX, TX and IO0. Too good to be true. They were probably used at the factory to flash the stock firmware on the controller using a gig with pogo pins. Anyway it looks easy to solder some thin wires and upload custom firmware.
The only doubt left is how to control the LEDs. Googling the MY9291 chip throws one perfect match: the My-Semi MY9291 LED driver. Bingo. But the datasheet lacks any information about how to use it…
Digging on the Internet
Aside from the product in Ebay or Aliexpress there is little information about these light bulbs in the Internet. But with the information I already had I dug a little bit on the Internet and found two interesting pages.
FCC aplication
On one hand I there is the FCC application by Ai-Thinker dated November 9th, 2016. In the application, aside from some interesting documentation like the cellphone app “Tuya Smart” user manual, there are plenty of images from the inside of the product.

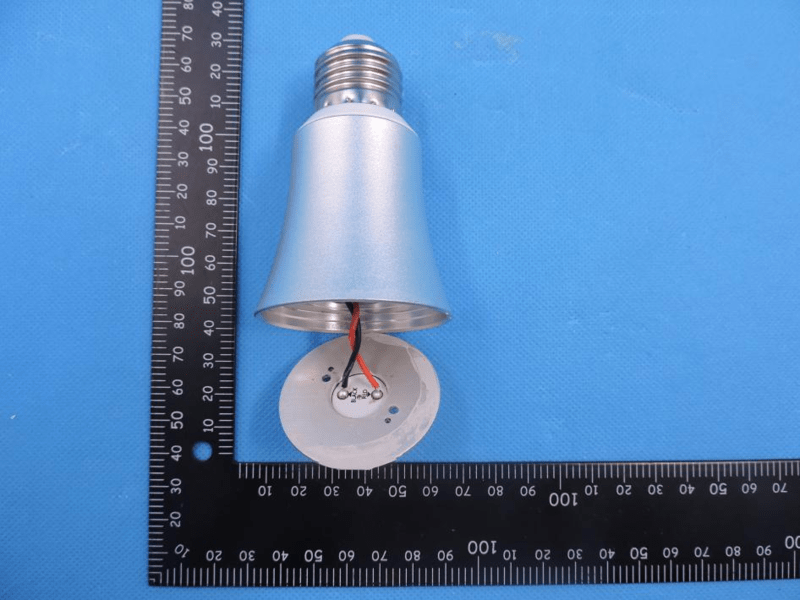
As you can see in the pictures below the PCB is glued and behind it there is a small AC/DC transformer. The bulb itself is 116mm long and 62mm diameter.

Noduino OpenLight
On the other hand, going down the path of the MY9291 reference you quickly found the Noduino OpenLight wiki page at JacksLab, by Jack Tan, alias comcat, the guy behind the Noduino project. In that page you have lots of information about the light bulb including sample code and the schematics of (part of) the circuitry by Jack.
Apparently Jack Tan or the Noduino team is behind this product somehow. Anyone knows what relation is there between Noduino and Ai-Thinker? In the Noduino OpenLight page there are pictures of a virtually identical light bulb in the shape but also with the same PCB. But not only that.
You have an precise description of the LED PCB and reference to the MY9291 LED driver by Taiwan Mingyang (hence MY-Semi). It also confirms that the AC/DC transformer outputs 12V at 1A max. And describes two different step-down ICs. The MP1470 and the MP2359, both by MPS. The MP1470 has the ADJ mark.
But most interesting, the page includes a section on how to compile your own firmware for the OpenLight based on the Noduino SDK.
A library and a little bit of code
I checked out the Noduino SDK and there it was: a C driver for the MY9291. That's everything I needed. By the way, I noticed the Noduino SDK includes my HLW8012 library (but not the most up-to-date version).
The driver is licensed GPLv3 and copyrighted to Maike Labs, Maike Labs is icamgo and icamgo is Noduino. You can use the driver as is but I took some time to encapsulate it in a library with some helper methods to manage the color and state of the LEDs. I have tested it with the ESP8285 in the AiLight but should work on ATmega328 or other AVR chips.
The MY9291 library for Arduino ESP8266 is released as **free open software **and can be checked out at my my9291 repository on Github.
Let me show you a simple example on how to set red LED on at 100% duty cycle (MY9291_COMMAND_DEFAULT defines 8-bit color depth so 255 means 100%):
#include <my9291.h>

#define MY9291_DI_PIN   13
#define MY9291_DCKI_PIN 15

my9291 _my9291 = my9291(
    MY9291_DI_PIN,
    MY9291_DCKI_PIN,
    MY9291_COMMAND_DEFAULT
);

void setup() {
    _my9291.setColor((my9291_color_t) { 255, 0, 0, 0 });
    _my9291.setState(true);
}

void loop() {}
Flashing it
It might look hard to solder those small pads in the beginning but it's actually really simple. Get a 5 wire cable and remove 1-2mm of insulation from the wires, tin them a bit. Apply a hot wire on the pads and leave a small drop of tin on them too. Then just touch each wire with a pad and heat them together for a fraction of a second.
Connect the wires to you FTDI (or alike) board. TX to RX and RX to TX. Connect GND and IO0 to ground and finally 3V3. Once you plug your programmer to the computer the board will boot into flash mode. While you are flashing it you can remove the IO0 connection. Upon reboot it will enter normal mode and you should see the debug messages in the screen.
ESPurn'd
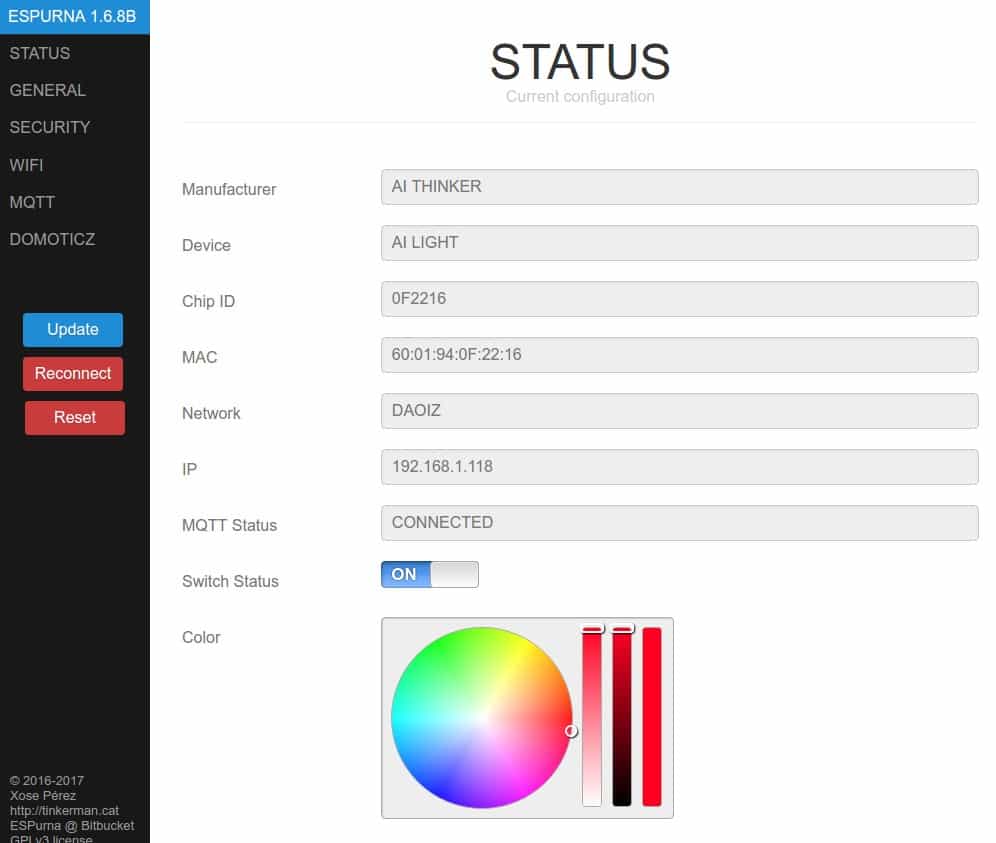
And of course it has been ESPurn'd. Version 1.6.7 of the ESPurna firmware supports the Ai-Thinker AiLight / Noduino OpenLight. You can turn on/off the light bulb and select the color from the web interface or you can do both things via MQTT from Node-RED for instance.
"AiLight - A hackable RGBW light bulb" was first posted on 26 February 2017 by Xose Pérez on tinkerman.cat under Code, Hacking and tagged aithinker, ailight, comcat, esp8266, espurna, fcc, hlw8012, jack tan, m1636, mp1470, mqtt, my9291, node-red, noduino, openlight, philips hue, taiwan mingyang.